Displaying custom facets in Contact Profile
In my previous post, I explained how to create custom facets and store them in xDB. In this post, I’m going to show you how to display custom facets in Experience Profile.
Experience profile lets you monitor the behaviour of contacts that have interacted with the website. It allows you to search a specific contact, either via either name or email.
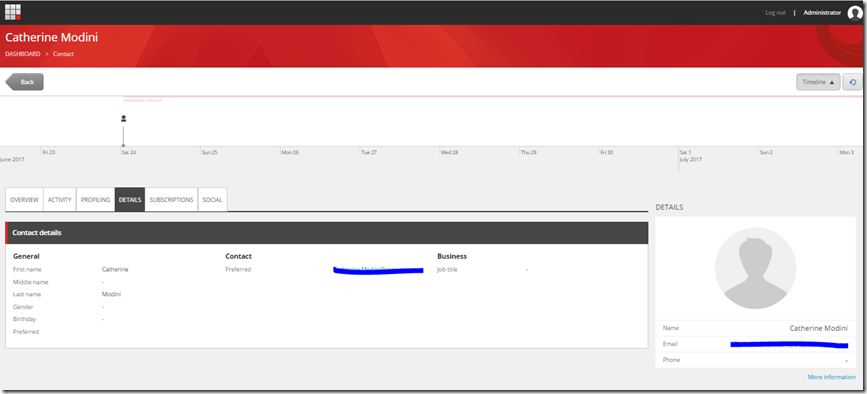
If you click on the contact, then you will be able to view the contact profile as shown in below. This is cool right?!, however, you may find that Sitecore does not automatically display custom facets.
In order to to achieve this, custom code is required. Therefore, I’m going to show you how to create a custom tab in the contact profile and display custom facets step by step.
STEPOne – Create custom facets
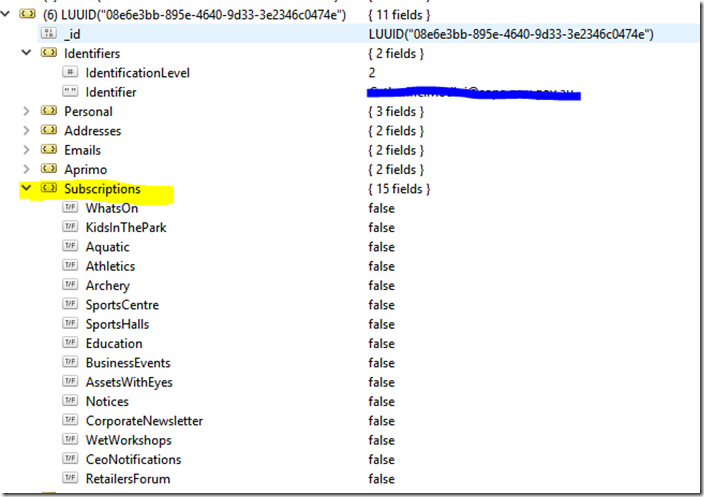
In my previous post, I’ve created a newsletter subscriptions facets and stored in xDB.
However, creating custom facets is not the scope of this post, if you want to learn how to create custom facets, you can refer to my previous post here.
STEP Two – Create Web API for retrieving the facets by contact id
This is much like any other WebAPI you will have created, and I would recommend applying access restrictions to the API for security reasons, you can apply Sitecore’s existing security filter called AuthorizedReportingUserFilteruse, which is defined in Sitecore.Cintel.dll.
Here is an example code:
Once you complete the implementation of your API, the next step is to register the API in route.
STEPThree – Create SPEAK script; this will call our API
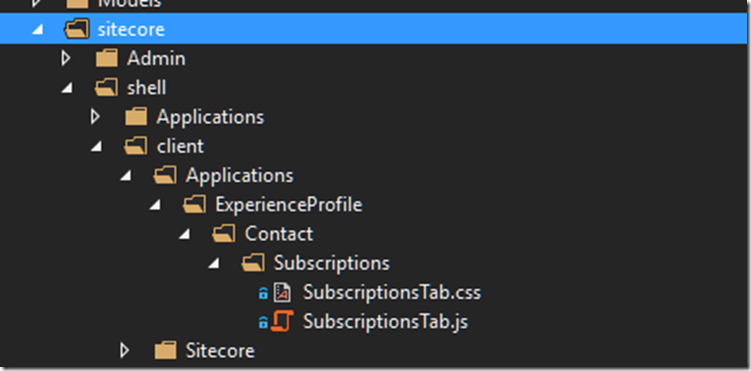
- Firstly, I’m going to create a folder called “Subscriptions” under /sitecore/shell/client/Applications/ExperienceProfile/Contact/Subsriptions
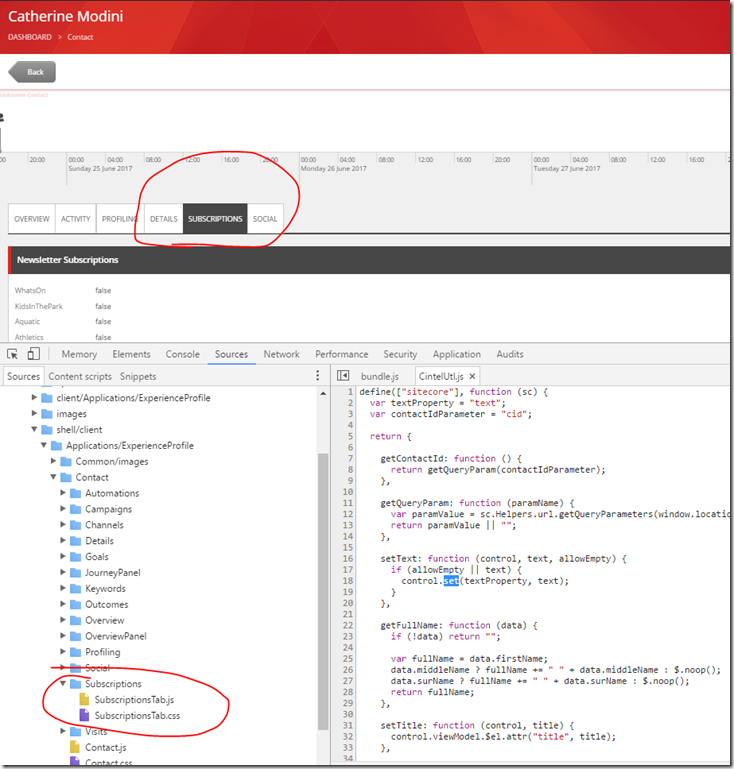
- Next, I will add subscriptionsTab.js and subscriptionsTab.css under the folder. (as shown as below)
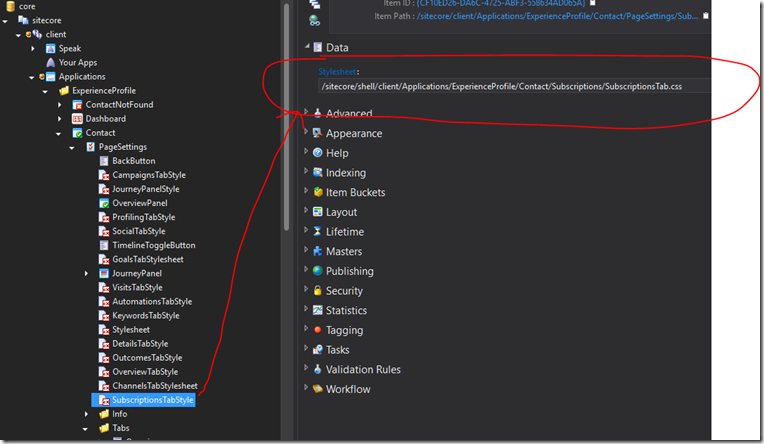
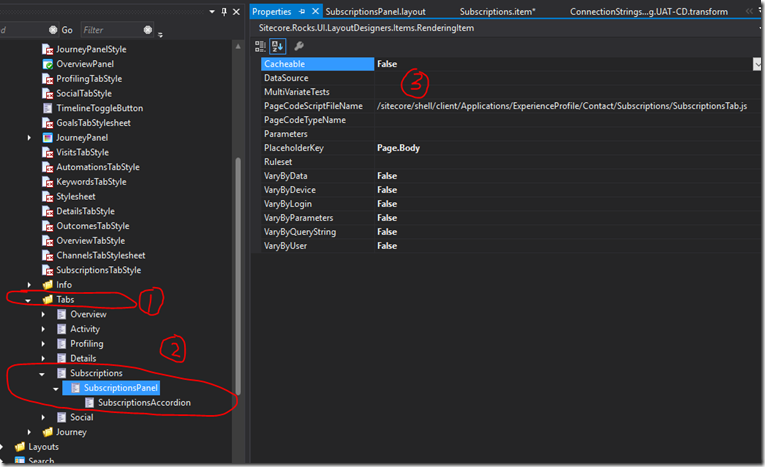
- Associate the created CSS in core database
you will need to add style item in core database and point at the css file. The defined css will be loaded automatically, when contact profile page is loading.
- Associate the created JavaScript in core database
In this step, I created a new custom Tab, called “SubscriptionPanel” and PageCodeScriptFileName is where you should associate with the JavaScript we just created above.
In order to verify what you’ve done so far is correct. you should be able to see the new custom tab “Subscription”, and both subscriptionsTab.js and subscriptionsTab.css are loaded, after contact profile page is loaded.
The next step is to write a script for retrieving the data via the custom API you created above. Sitecore use SPEAK as a framework for developing Sitecore application with a consistent interface. The syntax is very simple to follow and extend.
Here is the sample code for calling the API and return Json.
STEPFour – Binding Json object to the controller on the custom Tab
The last step is to display the Json data on the custom Tab.
In the above code snippet, you will find this code cintelUtil.setText($that.WhatsOnValue, jsondata.WhatsOn, true);. this sets TextBox “WhatsOnValue” within the controller, so it contains the Json value. Then, the next question is how to define the “WhatsOnValue” textbox in Sitecore? Don’t fret, I will show you how this can be done!.
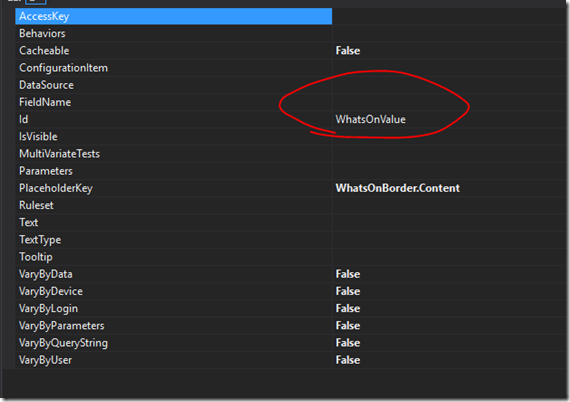
- Add Text rendering (Note: because I’m using SPEAK 1.1 framework, I will have to select the Text rendering under SPEAK 1-1)
- Set the ID to “WhatsOnValue”, this is the ID where the cintelUtil.setTextto function is referring to.
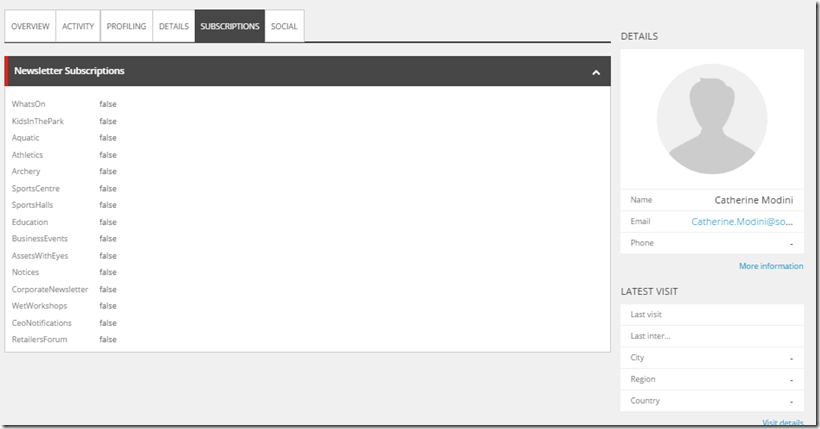
Congratulation!! you’ve done all the code and configuration. Now let’s check out the result, The “subscriptions” tab should display in the contact profile page as well as the custom facets associating with the contact.
Hope you found this post is useful, and enjoyed this article.
