0 Comments
  •   Posted in: 
  • SXA

theme-syncronize

Have you ever been asked the question – Is “import theme” the only way to update/upload themes in SXA? Importing themes is easy, however,  sometimes it’s easier if the theme could be uploaded automatically whenever CSS/JavaScript is changed.  It would be more productive/efficient for front-end bug fixing/debugging, as front-end developer don’t have to always login sitecore, and upload file manually.

Fortunately, out-of-box SXA already has such hidden feature. I said it’s hidden, as it’s not been mentioned in official documentation, but it’s there.

How to enable auto-synchronizer?

  1. Open /Website/App_Config/Include/Feature folder and remove .disabled from z.SPE.Sync.Enabler.Gulp.config.disabled file;
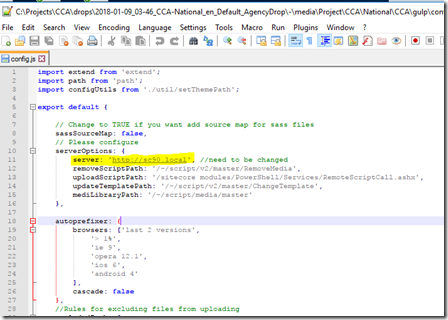
  2. Update config file for Gulp tasks. **ThemeRoot/gulp/config.js** file as shown below.

image

3. Run gulp

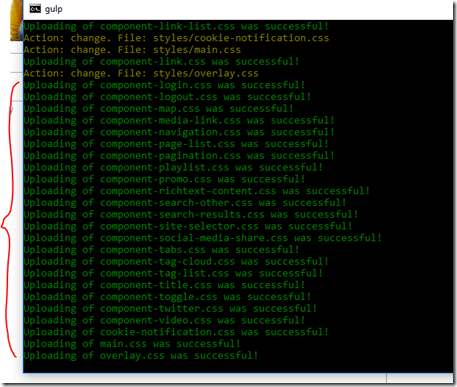
image

After that, you will notice that all compiled css/javascripts are automatically uploaded into Sitecore. (Tips: Disable optimizer, otherwise you will have to manually delete optimized.min files)

0 Comments

Best-WordPress-Search-Plugins-shutterstock_204851350

Sitecore SXA search features are really flexible and everything is content manageable.  While SXA search will often meet the client search requirements, there are some limitations with the out-of-box implementation i.e. the rendering template is hard-coded in the JavaScript, which can present difficulties to when the front-end developers want to work with these. 

Therefore, we want to extend the search results rendering so as to provide front-end flexibility, allowing for changing the mark-up, and also make sure the results mark-up is scalable and re-usable.

If you are already familiar with the SXA search result rendering, please feel free to skip the next paragraph.


How does SXA search result rendering work?

Search results rendering is one of the SXA search components, it’s utilizing the global scope for sharing the settings between each of the search components i.e. search box, search filter, load more button etc.. After the initial load of a page, the search results rendering will make an Ajax call to the search service API by passing the search scope and query.  Once it gets the results from server,  it will then render them on the page with the pre-defined template.  This is how the out-of-box search results rendering work. The approach is good, as it modularizes the feature into small individual features i.e. pagination, search box, filter etc., which has great maintainability and reusability.


Custom search results rendering

The custom search results rendering described below is built on top of the out-of-box search results rendering,but adds some enhancements.

We are going to:

  • Move the template into cshtml view (New)
  • Allowing randomly order (New)
  • Server side return results (New)
  • Enable experience editor for the result items (New)
  • Use variants for search results
  • Make use of the global scope


We are going to do this, using the following steps:

Step One –Create SXA rendering controller

As when creating other custom SXA controller, you will need to create a custom search results controller.  If you are unsure how to a custom custom rendering, please refer to my previous post here.

Step Two–Create custom search results repository

In order to use the variant for rendering the search results, the custom repository needs to inherit from VariantsRepository, which is the Sitecore.XA.Foundation.RenderingVariants.Repositorie namespace.

Also, we will need to inject IScopeService for utilizing the global scope in the custom repository constructor as shown below.

public CustomRepository(IVariantsRepository variantsRepository, IScopeService scopeService)
    {
        this.VariantsRepository = variantsRepository;
        this.ScopeService = scopeService;
    }

Next we need to create a custom method for retrieving the results.

public IEnumerable<ContentPage> GetItems()
        {
            var searchService = ServiceLocator.Current.Resolve<ISearchService>();

            string indexName;

            var query = searchService.GetQuery("", this.JsonDataPropertiesObject.S, this.JsonDataPropertiesObject.L, null, out indexName);

            …
        }

Step Three–Create custom search results View

<div @Html.Sxa().Component("custom-search-results", Model.Attributes)>
    <div class="component-content">
        @if (!Model.ChildrenItems.Any())
        {
            return;
        }

        <ul class="search-result-list">
            @foreach (var contentPage in Model.ChildrenItems)
            {
                <li>
                    @foreach (var variantField in Model.VariantFields)
                    {
                        @Html.RenderingVariants().RenderVariant(variantField, contentPage.GetItem(), Model.RenderingWebEditingParams)
                    }
                </li>
            }
        </ul>
        <div class="search-result-overlay"></div>
    </div>
</div>

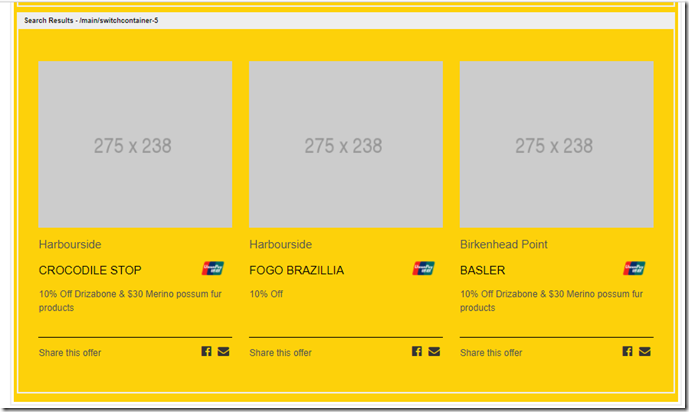
This is what it looked like in Experience Editor, content editor can see the search results.

image

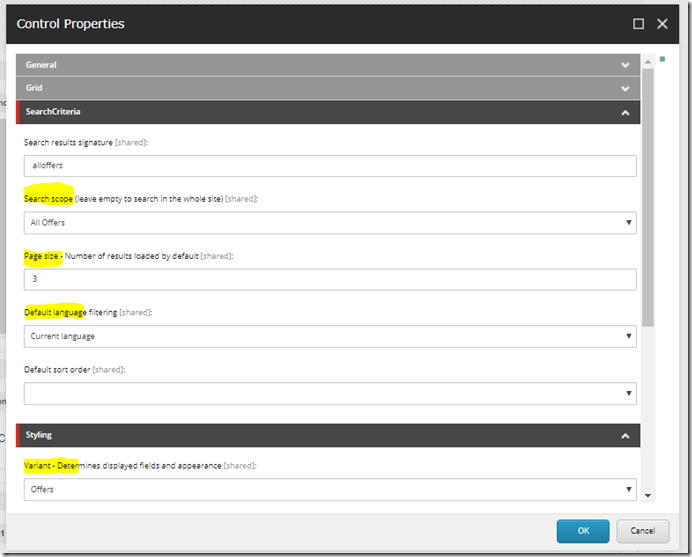
And all the settings are CMS-configurable

image

Hope you enjoyed the post and found it’s useful.

0 Comments

Recently, I’m having an issue with SXA as summarized below.  It took me quite a while for investigating and thanks to Sitecore support, it has been resolved. Therefore, I think it’s better to share it, as others may have the same issue.

Apparently it’s a bug and to track the future status of the bug report, you can use the reference number 95437

Here is the issue:

If the link field is used to wrap other fields as an example below, after user insert an link the image will disappear.

@Html.Sitecore().BeginField("Link")
  @Html.Sitecore().Field("Header Image")
@Html.Sitecore().EndField()


In order to get ride of the issue, you can render links with child images like:

@Html.Sitecore().BeginField("Link",new {haschildren=true})
  @Html.Sitecore().Field("Header Image")
@Html.Sitecore().EndField()

1 Comments
  •   Posted in: 
  • SXA

Since Sitecore releasedSitecore Experience Accelerator, there has been has a lot of discussions around why businesses that currently use Sitecore, would need SXA, and how SXA can speed up the development process. In my previous post I talked about how to create a custom SXA component. In this post, I’m going to share my experience with building a website using Sitecore SXA.


why SXA is good

SXA allows for the designers, UX and UI teams to work with the developers

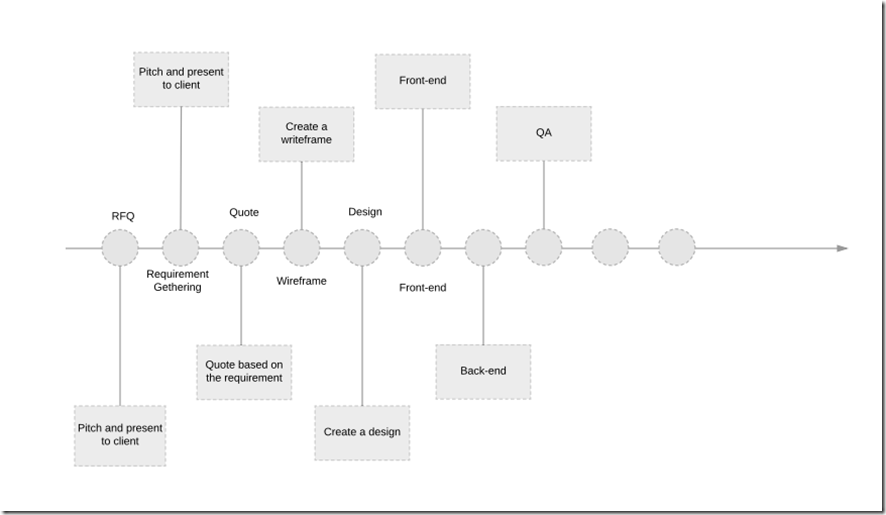
In the traditional process, wireframe, design, front-end and back-end are working in sequence as shown in below diagram.
 

image

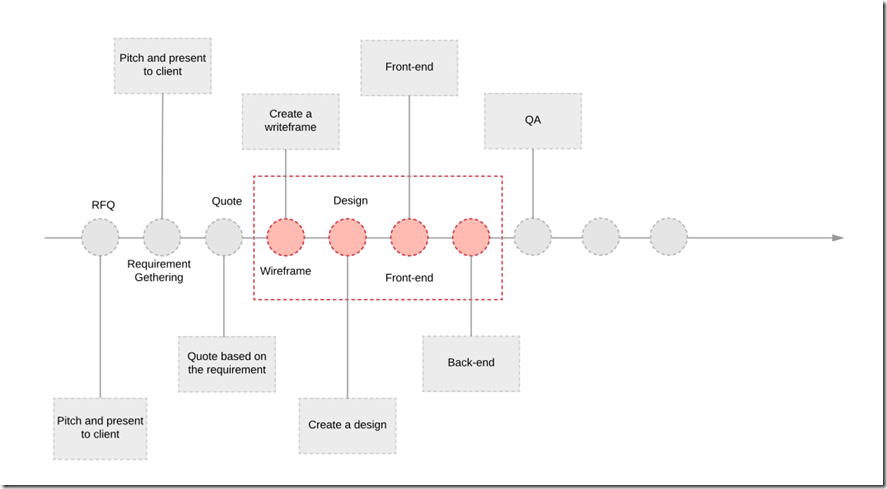
However, SXA gives the possibility for UX, Design, front-end and back-end to work in parallel.
image


SXA force best practice principles

As mentioned above, Sitecore SXA was built with Sitecore Helix framework in mind.  Developer can extend and customise the SXA features, however,  the same framework and principles have to be followed.


Reusable components

You may be thinking , but I can create component in traditional Sitecore solution and make it reusable already!  Why call out SXA?  This can be best answered with an example.

The below is a design example, and I believe as Sitecore developers, we will all agree that the circled widget is likely to be a rendering with a data source applied?

image


However, this would not be the approach you would talk with SXA! In SXA we define an individual column as a component.  According to the design, we will repeat the same component three times. Sitecore SXA has pre-built renderings(component) which can help us understand the principles and which we can utilise; These can be found here

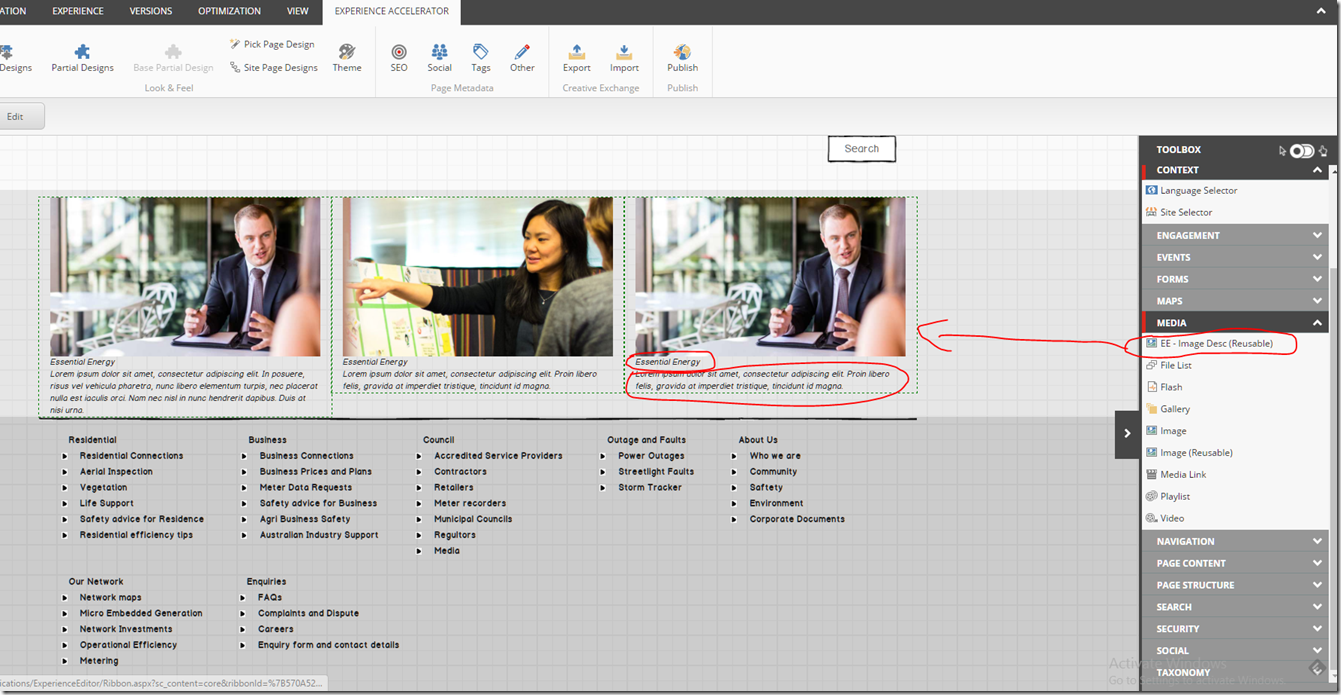
In this example, the rendering we will want to re-use would be the Image (Reusable) rendering (component)!,  this means no custom rendering is required.  You just saved yourself some Back-end dev time, integration with front-end, and testing! 

SXA can significantly speed up your development process!

image


Building a website with SXA

Prepare SXA solution

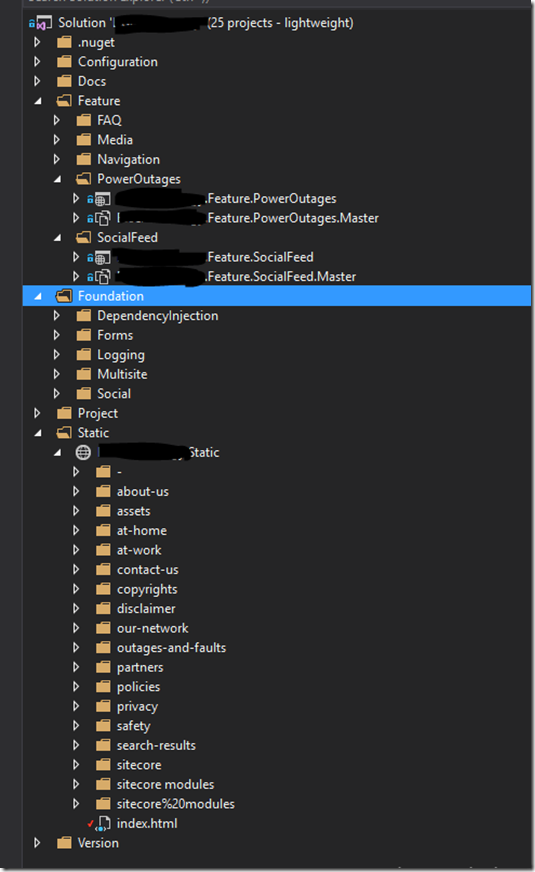
Setup Sitecore solution by following Sitecore Helix framework.

Here is the sample structure
image


Define your renderings

As explained above,  in SXA when we are trying to define the rendering, we want to keep it small so that we can easily reuse it across the site.

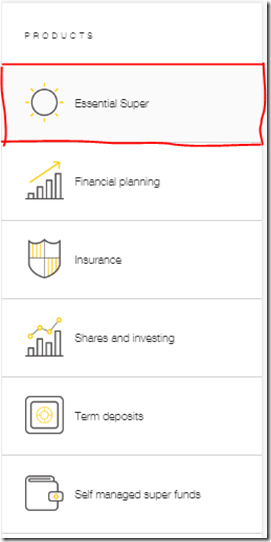
The below is an example design for a quick links rendering (component).   Instead defining the whole panel as a widget/ rendering with data source,  we can use Image (Reusable) rendering and take the advantage of SXA rendering styling feature.
image


Here is how you can create a quick link rendering (in10 minutes).

1. Add  a container rendering
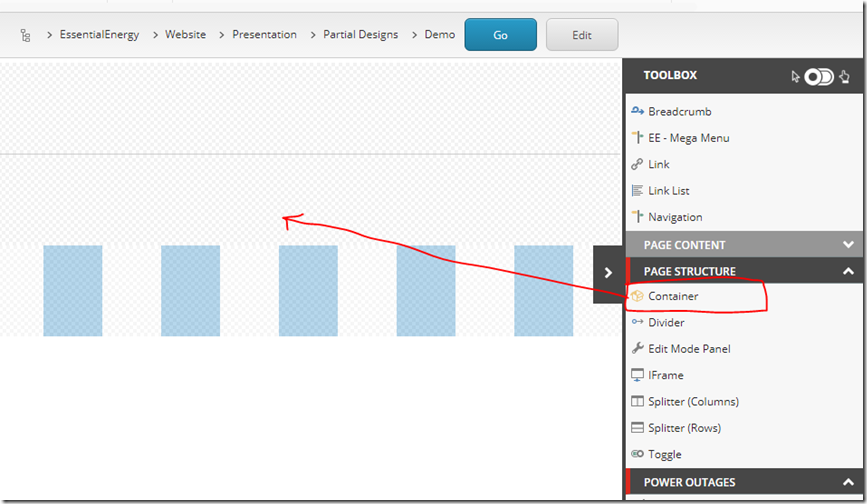
image

2. Add  an Image (Reusable) rendering into the container
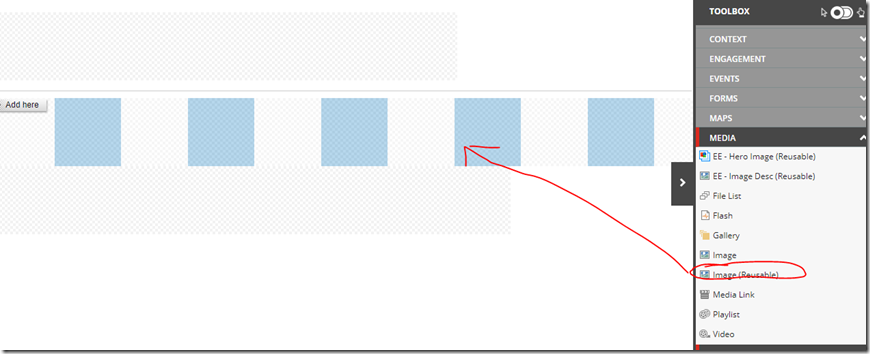
image


Once you done this, it basically means you have a div wrapper for the image (Reusable)

<div class =”component container”>

..

[Image (Reusable) Rendering]

..

</div>

In order to make the image (Reusable) rendering have the same look and feel as per design, you may need a custom style.

Under site presentation, I created custom styles (I don’t want to mess with SXA styles).  I believe its important to keep the out of the boxes styles separate from out custom styles.  SXA also allows you to select allowed rendering per style.  In our case above, we are going to create a new style called ”Quick Links, and in “Allowed Renderings” select container rendering.
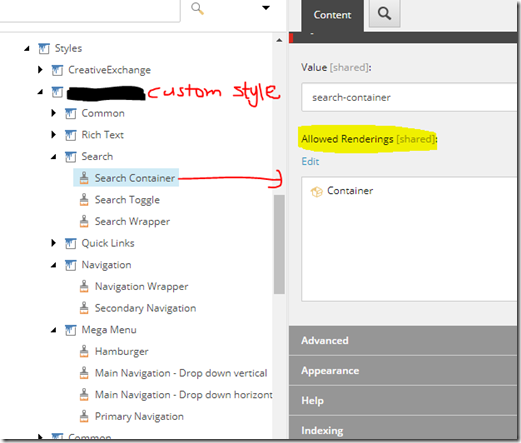
image


After that, you should be able to see the custom style in the Styles property window
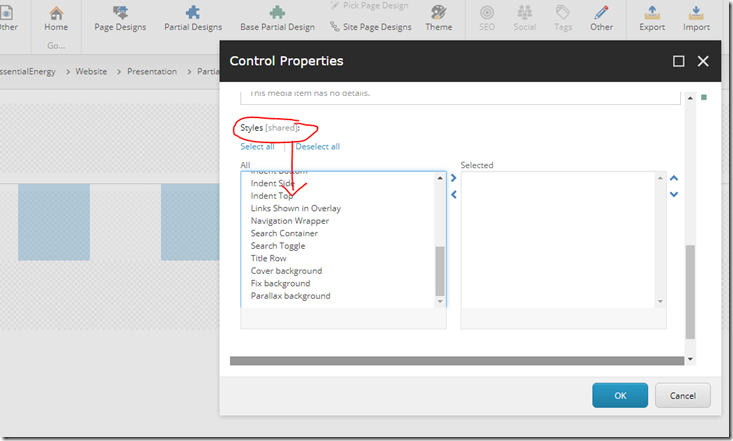
image

Once you’ve done, I’m sure your front-end can do the magic to make it pretty as per the design.  easy right?

In some cases, you may need to create your own renderings, you can read my previous post about how to create custom rendering here.


Page Designs

Page design is defined in your project scope which is the number of page templates you are going to build.


Partial  Designs

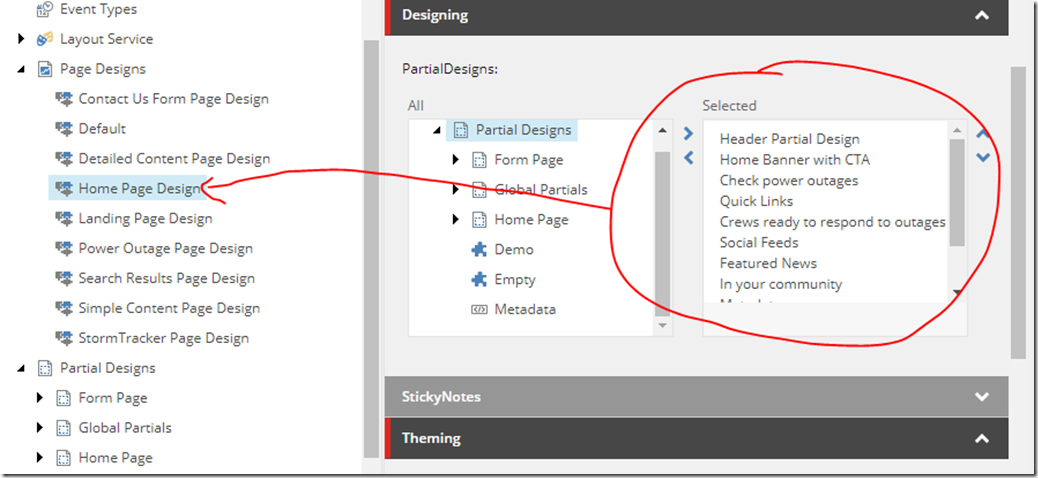
Partial design is one of the beautiful design principles with SXA, where you would normallyhave presentation details defined (against standard values), SXA separates and moves these to site level. 

Partial design has the same concept of MVC partial views. SXA allows you to select multiple partial views for a page design.
 

image


Export/Import the site

Once you finish the page design, you can then export either a single page or the whole site, front-end developer can start to re-skin by creating a custom theme.

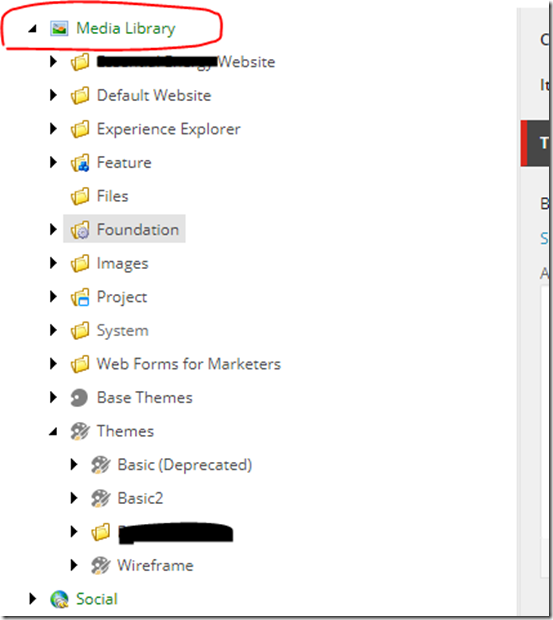
SXA stores all themes in media library. After restyling is completed, you can reimport these into Sitecore and SXA will automatically create new css and javascript accordingly in media library.
 

image


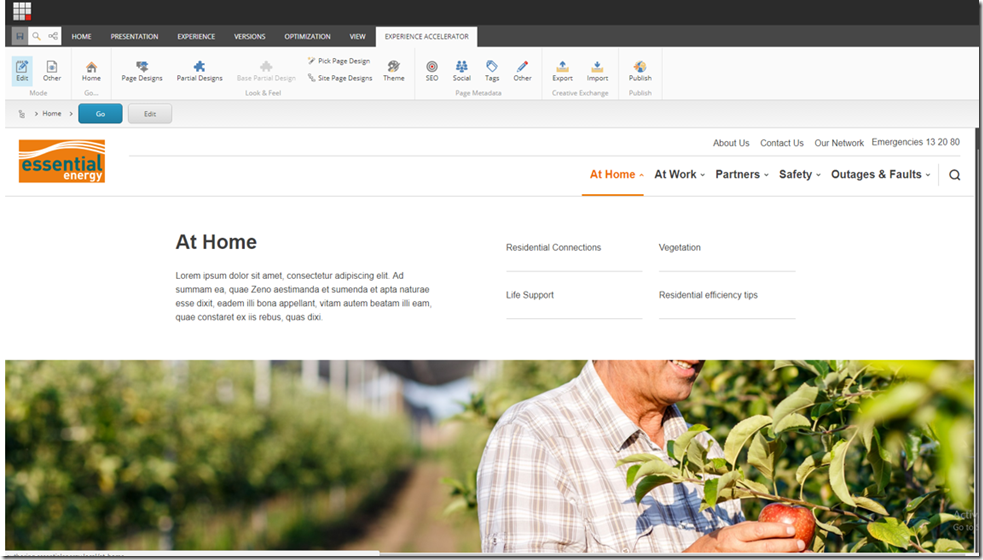
After successfully reimporting the site,  congratulations! you’ve done your first SXA site.
image


If you would like to see a live demo, please join the August Meetup of the Sydeney Sitecor User Group. Click here for RSVP.
1 Comments

image

Sitecore recently released the Sitecore Experience Accelerator (SXA) and I guess that It is still quite new to most of Sitecore developers.

Recently I was asked to implement SXA for one of our clients and while there is a lot of information online covering SXA and how SXA can be used to quickly create websites, there is no much documents for us developers!  So many advanced features are not covered in details (at least not at the time of writing this).  Therefore, I am going to share my experience with SXA here. 

Specifically, I will explain how to create custom components with SXA. If you don’t know about what SXA is,  I would suggest to read the below listed articles:

As you may already know, SXA has been implement using the Helix principles.  Helix principles are however not covered within this post.  If you want to get familiar with Sitecore Helix, there are many resources available online.

Now, let’s get started! Let’s start by creating an SXA component step by step together.

What we want to achieve here?

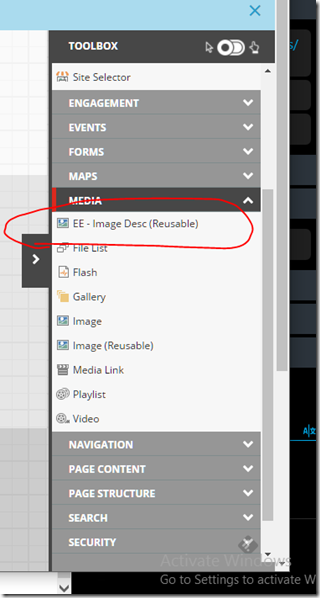
To create custom SXA component and register on the Tool bar so as to allow user to drag and drop into a page.

image


Getting started to create custom SXA component

Step 1 – Install Sitecore  and SXA

I’m using SXA 1.3, it requires Sitecore 8.2 rev.170407.   you can download from here

SXA heavily relies on Sitecore PowerShell Extensions, so please make sure you has installed PowerShell Extensions 4.5.

Step 2 – Setup Helix solution

Setup Sitecore Solution following the Helix principles.  Sitecore also provide a sample Helix solution called Habitat, which can be found on Github.  Habitat is a good starting point if you want to learn how to build website using the Helix principles.

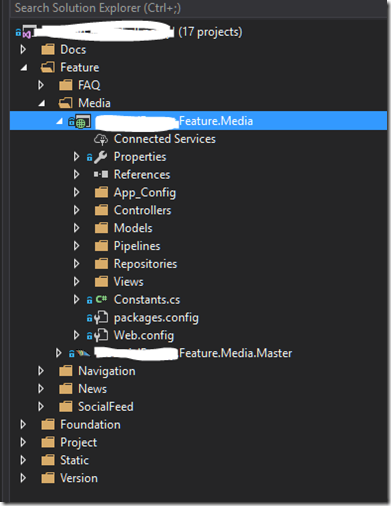
image

Step 3 – Create a new feature

There is not much difference for creating a SXA component. It’s very similar to how you would create standard component within Stiecore solution.

Rendering Controller

First, you will need to create a controller. The only difference here is that the controller needs to inherit from SXA StandardController; this can be found under the Sitecore.XA.Foundation.Mvc.Controllers namespace, as shown in below snippet:

Rendering Model

Then, create rendering model, called ImageRenderingModel, by inheriting from SXA RenderingModelBase; this can be found under Sitecore.XA.Foundation.Mvc.Models namespace, as shown in below snippet:

RenderingModel Repository

After that, the next step is to create a repository for retrieving data from datasource. I created a model repository called ImageRepository by inheriting from ModelRepository; this can be found under Sitecore.XA.Foundation.Mvc.Repositories.Base namespace, once again as shown in below snippet:

Rendering View

Finally, I’m going to create a rendering view as shown in below snippet:

Step 4 – Register Image Repository in IoC

As you can see in the screenshot below, the MediaImge controller constructor has a IImageRepository parameter. In order to inject IImageRepository into the controller,  it needs to be registered in IoC.

SXA has implemented its own IocProcessor, which allows us to easily register custom repositories into the SXA IoC ServiceCollection via a pipeline.

image

Here is the code for leveraging IocProcessor to register the ImageRepository.

Next, I will add the service I just created into pipeline:

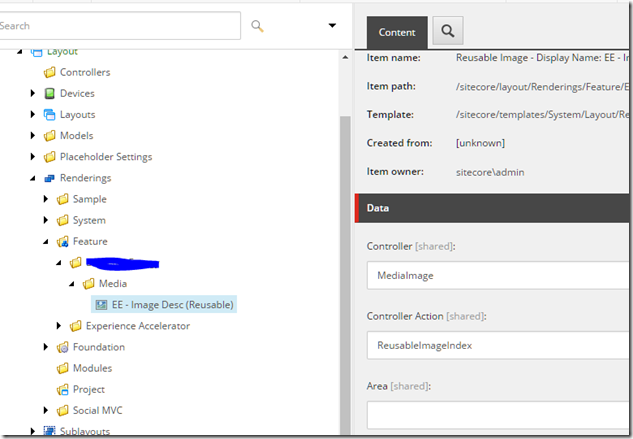
Step 5 – Create rendering controller in Sitecore

I am going to assumed you are already familiar with Sitecore, so i’m not going to explain how to create a rendering controller in Sitecore.

image

Step 6 – Add new component into SXA tool bar.

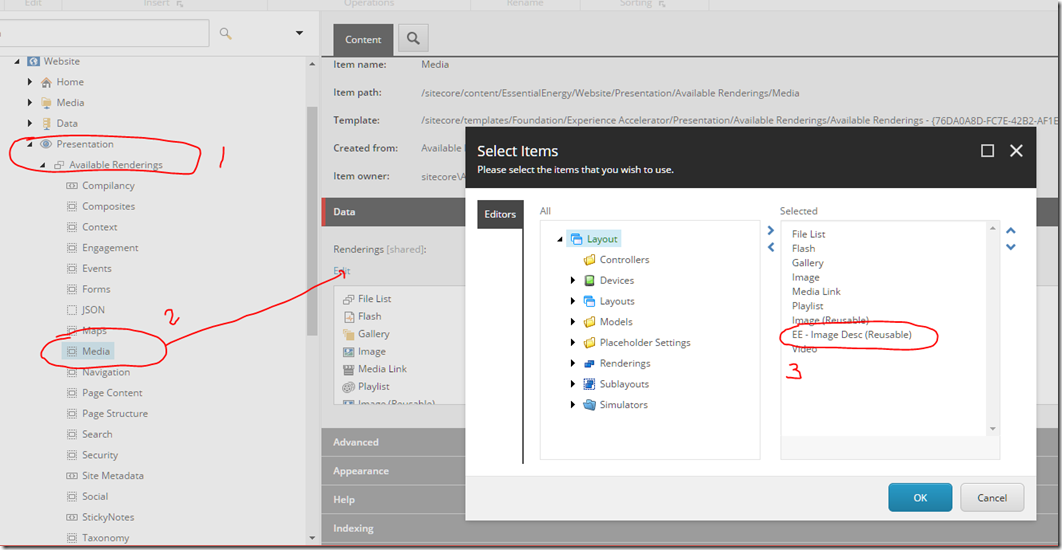
Finally, we just need to add the rendering by selecting presentation –> Available Renderings –> Media and selecting the rendering controller we just created.

image

Congratulation, now you successfully created your first SXA component.

image


I hope you found this article is useful. Please follow my blog, and feel free to email me if you have any questions about SXA.