0 Comments

blog

Finally Sitecore commerce 9 (SXC9) is released! Like everyone else, I’m getting excited about the new release.


Yay-clipart-free-download-clip-art-on-4

It’s not a secret that the previous Sitecore commerce is super hard to use, as it relies on a legacy system – the RIP commerce server.No more Commerce Server!Thisis one of the most exciting news for Sitecore commerce. I believe everyone is happy that we no longer needs to deal with the commerce server. Secondly, it supports SXA, which should really speed up the implementation of the commerce site from the ground up.


Getting started

Now, let’s start to spin up a Sitecore 9 commerce site together.

Before starting to install SXC 9, please make sure you have Sitecore 9(XP0) update-1 installed. If you don’t know how to install Sitecore 9, you can read my previous post here.

Preparation

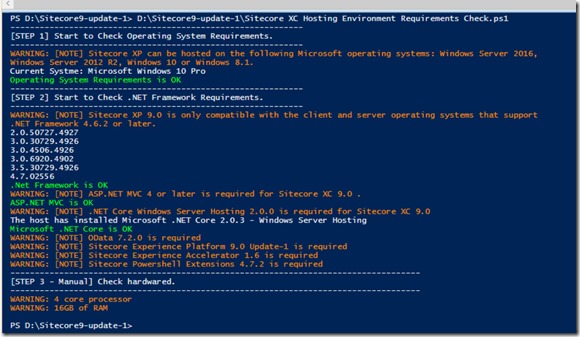
Once Sitecore XP0 installed, the next step is to check the environments includes system requirements, framework requirements etc. I wrote PowerShell script for checking all the required bits and pieces that listed in the Sitecore commerce 9 installation guideline.  you can just simply follow the official documentation.
blog-2

Installing commerce 9

In this section, I’m going to explain the steps for installing Commerce 9 as well as the issues you may encounter during this process.

Ready? Okay, let’s get stared.

[Step One]

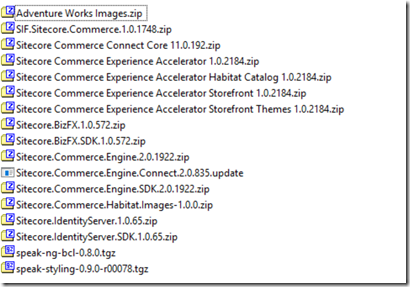
Download package from Here.  The package I'm using for this demo is the On Premises  version.  Please feel free to use the azure version, if you are more comfortable with Azure environment.

Once you downloaded the package, unzip the package.
image

[Step Two]

Create a deploy Folder, and copy the above files into the “deploy” folder you just created.  Then unzip the the zip files as listed below:

  • SIF.Sitecore.Commerce.1.0.1748
  • Sitecore.BizFX.1.0.572
  • Sitecore.Commerce.Engine.2.0.1922
  • Sitecore.Commerce.Engine.SDK.2.0.1922
  • Sitecore.IdentityServer.1.0.65

If you read the Stiecore official installation guideline, you will probably notice that Sitecore.Commerce.Engine.2.0.1922  and Sitecore.IdentityServer.1.0.65are not listed in the list, why here I’m asking you to unzip those two?

blog-5

This is because the default connection string for both Sitecore Identity Server and Commerce Engine are using “.”. Therefore, If your SQL server instance name is different from the default value, you most likely get these errors.
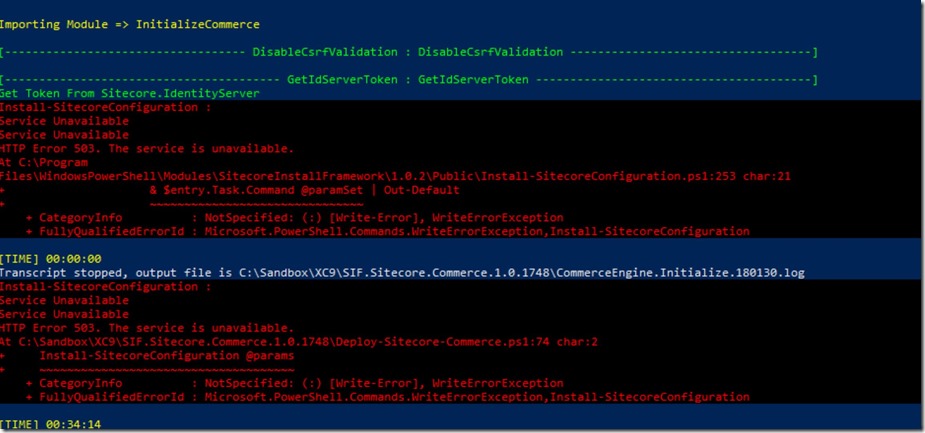
error-1

image

Update the server in the connection string in both the “appsettings.json” and the environments *.json files as well as global.json.

The global.json connection string is used to tell that engine role how to access the Global database that contains the environment information.
All of the environment data is declared in json files on disk, which are then read into the Global DB when you execute the BootStrap command.

Once you’ve done above, replace the vanilla zip files with the ones you updated.

[Step Three]

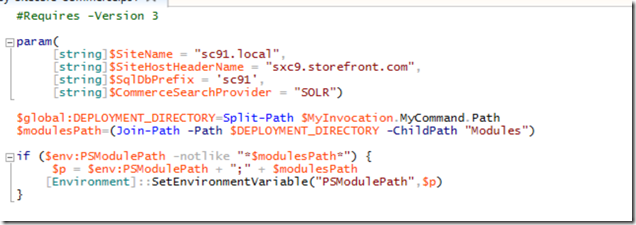
Open “Deploy-Sitecore-Commerce.ps1” in “SIF.Sitecore.Commerce.1.0.1748” Folder, and update the configuration as per your environment.

Here is an example
image

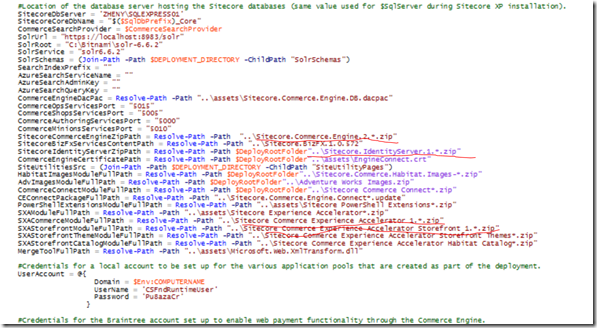
There are a few issues in the default script, for avoiding the runtime error, please change the value as highlighted in the screenshot below.
image

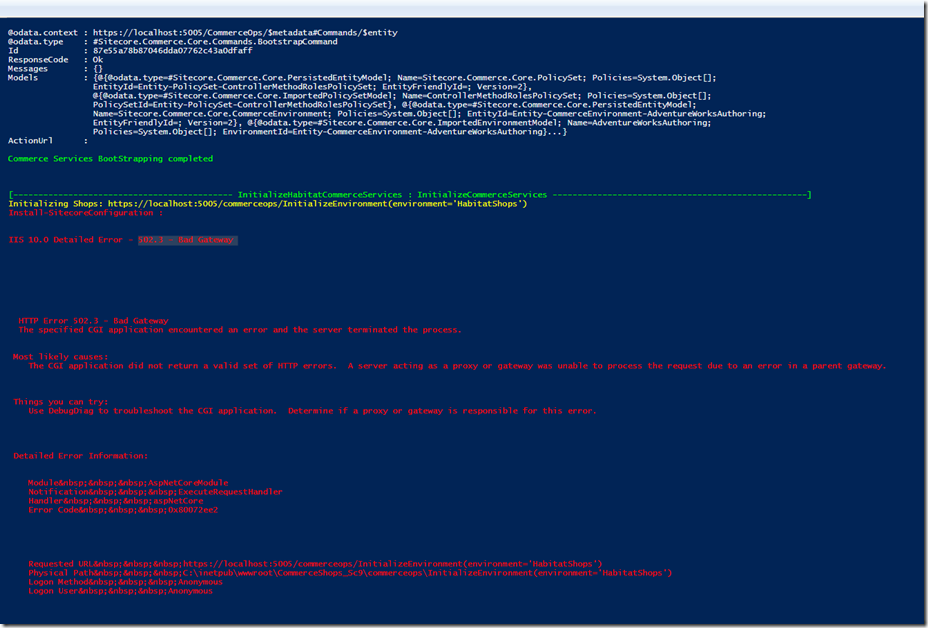
Otherwise, you may encounter an error as below

error-2

[Step Four]

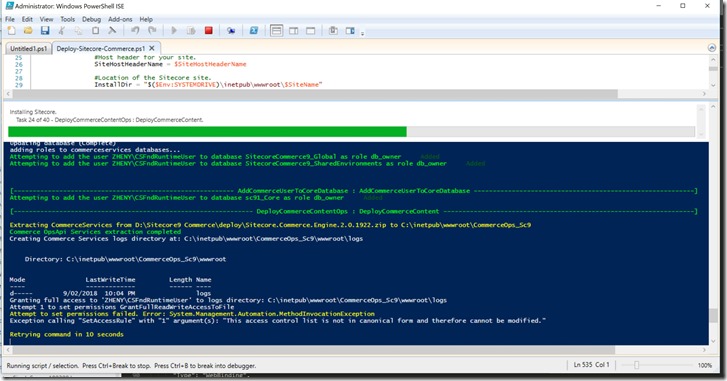
Finally, let’s run the script.  The whole installation takes about 30-40 mins.
Capture


[Step Five]

After it is successfully installed. you will need to follow the post installation steps in Chapter 4 of the installation guide.  

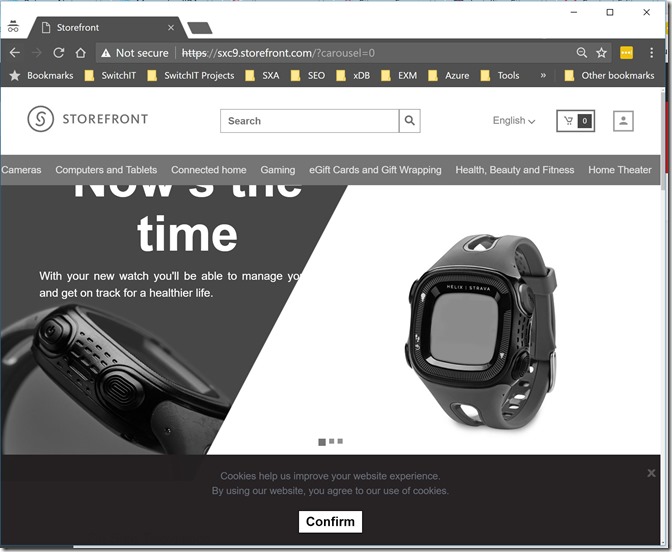
Finish? Congas! your Sitecore commerce SXA site is successfully installed.
blog-3

Thanks to Rob Earlam for explaining the concept, so that I’m able to troubleshoot the issues.  I hope this post can ultimately help you as well with the installation.
0 Comments

variant

In this post,  I'm going to explain some advanced features of SXA – Rendering Variant as well as how to apply custom rules for a variant field.

What is rendering variant?

Out-of-box Sitecore SXA provides a set of variants that come with renderings that support them. In the past, if a component, e.g. carousel, are rendering differently in design, most likely you will create a different rendering controller in back-end.  Fortunately, SXA solved this issue perfectly with rendering variants.  Rendering variants allows you to create one controller with many variants.  For example, the list rendering can have different variants for: detailed lists, thumbnails list, and a carousel.  For more details you can find here.


How to create rendering variant?

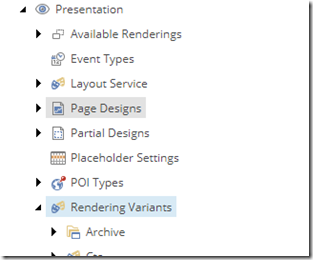
Out-of-box rendering variants are located under “/sitecore/content/Mirvac/RetailLeasing/HelloSydney/Presentation/Rendering Variants”

image

Each of the variant components has its own associated variants. The variant is associated with component by name convention. i.e. component “Search Results” is associating with “Search Results” variants.

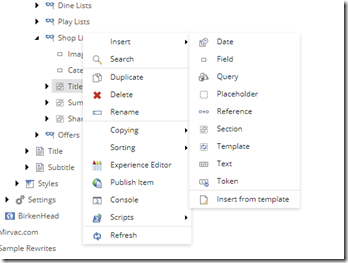
Out-of-box Stiecore allows you add 9 types of variant fields which includes Date, Field, Query, Placeholder, Reference, Section, template Text, and Token. To keep it simple, I’m going to use “Field” variant field. Once you are familiar with rendering variant, I will explain the more advanced fields i.e. template, reference, token, in my future post =).

image

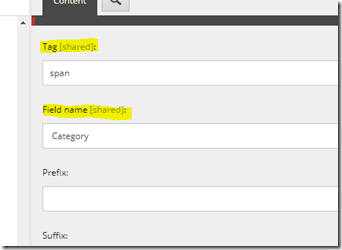
There are two important fields for adding a “Field” variant field, which are “Tag” and “Field name”. Tag is the html tag for the specific field. Field name is the field name of the data you want to rendering on the page. For instance, you want to render  title in a div on the page, the Tag will be “Div”, and Field name will be “Title”.

image


How to Apply rendering variant to component?

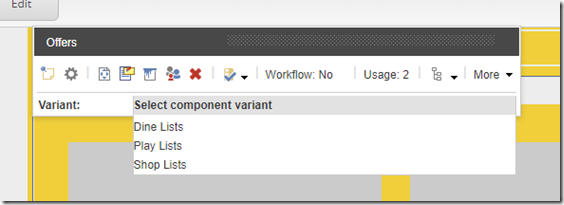
Once you finished creating your variant, the next step is to associate with the component on the page. In the dropdown list, select the one you would like to apply to the current page.

image


That’s all you need, simple right? In some cases, you might want to show/hide the field based on a certain condition. For instance, only showing a filed on Chinese site.  What you can do is to apply a rule for the rendering field. In the rest of the post, I will explain how to apply a custom rule to a variant field.

How to apply custom rule for a variant field?

Of course, for applying a rule, you will need a rule first. If there is no existing rules fits your requirement, you can create your own rules. It’s same as the way you used to create rules for personalization.

Here is the steps for creating a custom rule:

  1. Create a “Rules context folder” under /sitecore/system/Settings/Rules.
  2. Create a “Element Folder” under /sitecore/system/Settings/Rules/Definitions/Elements.
  3. Create a condition under the “Element Folder”  created above.
  4. Find “Default” tags definition under the “Element Folder” and select the tags you want to associated with i.e. Fields, GeoIP etc..
  5. Find “Default” tags definition under “Rules context folder”, and select the tags selected above.

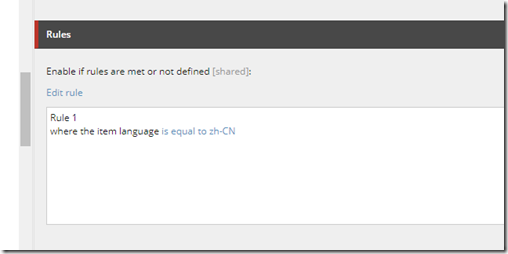
Once you’ve done the steps, you will need to find the variant field that  you want to apply the rule as an example shown in below screenshot. After that, the field will be rendering based on the rule condition.

image

0 Comments

Sitecore_MVP_logo

Yesterday, Sitecore announced their MVP Awards for 2018 awards, and I think you would be happy to know, that I have been awarded as Sitecore MVP this year.

I want to express my sincere appreciation and thanks to Sitecore for awarding me Technology Most Valuable Professional. It means a lot to me! Thanks to Azadeh Khojandi, James Hirka, Mike Bray, Nick JonesRichard Hauer, Michael Reynolds, Steve Nelson who always supports and encourages me. This list is by no means a complete, and without you this wouldn’t happen.

Also, I would like to thank all of Sitecore MVPs who nominated me and Sitecore judges who chose me from the list of nominees and I am truly humbled and honoured to receive it. 

A big thanks to the Sitecore community, thanks for reading the posts, commenting on it, following the blogs, listening the presentation, giving feedback and in the end, encouraging me to do more for the community. So, thank you!

Its a huge honour and privilege to get this award and I'm looking forward to an exciting year with Sitecore! And I promise I would do more and try to help the community as much as possible. 

Finally, I would like to congratulate to all of you who has been named as MVP in 2018.

40094815-congratulations-wallpapers

0 Comments

After install vanilla Stiecore 9 and I noticed the below error keeps showing in the log file.

ERROR Type 'Sitecore.XConnect.Segmentation.Predicates.Contacts.ContactIsAnonymous' not found in assembly 'Sitecore.XConnect.Segmentation.Predicates'

If you are having the same issue, try to clean %SystemRoot%\Microsoft.NET\Framework\v4.0.30319\Temporary ASP.NET Files" folder.

0 Comments
  •   Posted in: 
  • SXA

theme-syncronize

Have you ever been asked the question – Is “import theme” the only way to update/upload themes in SXA? Importing themes is easy, however,  sometimes it’s easier if the theme could be uploaded automatically whenever CSS/JavaScript is changed.  It would be more productive/efficient for front-end bug fixing/debugging, as front-end developer don’t have to always login sitecore, and upload file manually.

Fortunately, out-of-box SXA already has such hidden feature. I said it’s hidden, as it’s not been mentioned in official documentation, but it’s there.

How to enable auto-synchronizer?

  1. Open /Website/App_Config/Include/Feature folder and remove .disabled from z.SPE.Sync.Enabler.Gulp.config.disabled file;
  2. Update config file for Gulp tasks. **ThemeRoot/gulp/config.js** file as shown below.

image

3. Run gulp

image

After that, you will notice that all compiled css/javascripts are automatically uploaded into Sitecore. (Tips: Disable optimizer, otherwise you will have to manually delete optimized.min files)