3 Comments

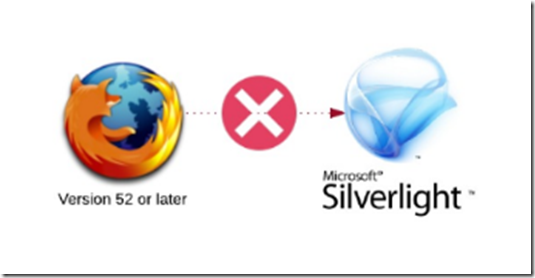
Mozilla Firefox 52 ended support for Silverlight

image

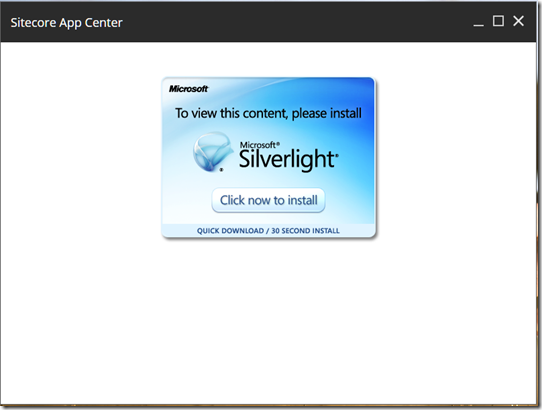
Is it matter? Yes, as we all known that Sitecore App Center was built on top of Silverlight. Since Version 42.0 Google Chrome has already stopped the support for Silverlight ( Find more Details).  However, you can still use Silverlight in Mozilla Firefox with Silverlight PlugIn. If you open your Sitecore App Centernow in Firefox, you see that the Install Microsoft Silverlight badge is displayed. When you reinstall Silverlight, the issure still occurs (See screenshot below). This is because Mozilla has ended of all NPAPI plugins except for Flash in March 2017, when Firefox version 52 is released. See this article for details. 

image

Don’t Panic!

Firefox Extended Support Release (ERS) will continue support these plugin until early 2018. Let’s pray Sitecore is ready for this transition to happen. To download the ERS click here

image

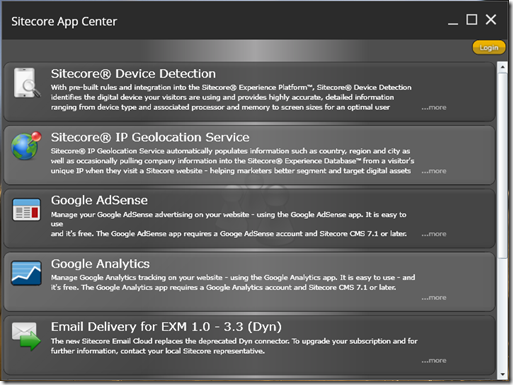
After you installed, Sitecore App Center is back.

image

0 Comments

Continues Integration with TeamCity and Octopus Deploy

image

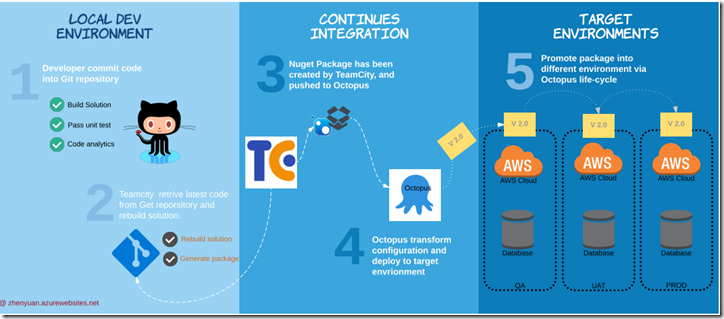
Since 2016, Sitecore has been promoting Sitecore Helix and encouraging all partners, and developers to follow the framework. The purpose of Helix is to make the modules easier to code, test and maintain.  If you want to stay ahead of the curve, then you should start to implement Helix for your clients. Practice makes perfect. The article is going to explain how to setup the auto-deployment with TeamCity and Octopus with Sitecore Helix solution.  There are two versions of Helix solution, one is using Unicorn, and the other is using TDS.  Today, I’m going to focus on the TDS version.

Before  I start I’m going to assume you are already familiar with TeamCity and Octopus.  If not, please read the official document for TeamCity and Octopus deploy first.

You might already be using continues delivery with TeamCity and Octopus, as this is not a new concept, However there are some new requirements for deploying Helix projects.

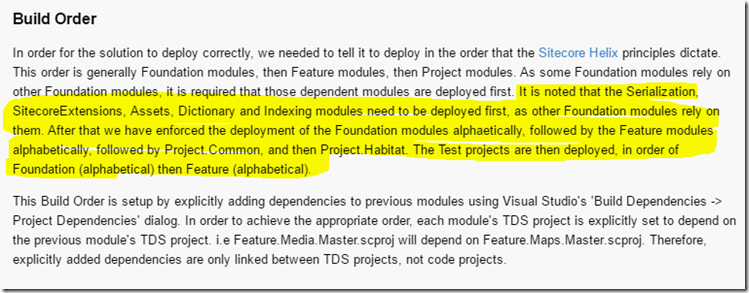
  • Build Order

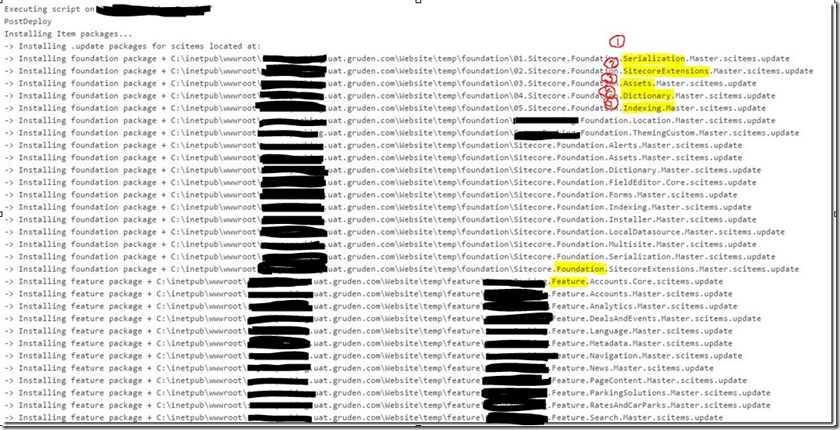
As mentioned in the Helix Solution ReadMe file, Serializationn, SitecoreExtension, Assets, Dictionary and Indexing modules need to be deployed first, and followed by Foundation modules and then Feature modules.

image

  • Configuration Transform per feature projects

Also, given the fact that Helix is utilizing XDT transforms, we are going to use XDT transforms for configuring Content Management Server (CM) and Content Delivery Server (CD).

image

In order to achieve the above requirements, I have modified the original solution to support Sitecore Helix, using the steps below:

Step one

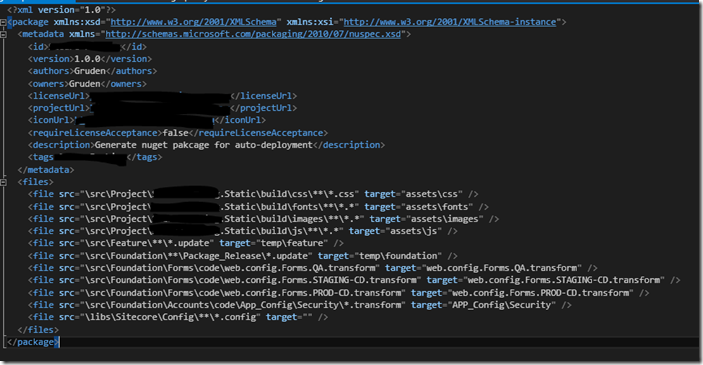
Creating a Nuspec File, includes all transforms.

Example:

You might notice that the transform file has applied a naming convention i.e. web.config.Forms.STAGING-CD.transform.  STAGING-CDis the environment as defined within octopus. This gives us the capability and flexibility to process the configuration transform based on the target environment, something that is difficult to achieve within most of Sitecore solutions, especially when you have multi-instance architecture (i.e. CD/CM). For more information on how Octopus transform configure files, please refer to the official documentation.

image

Step Two

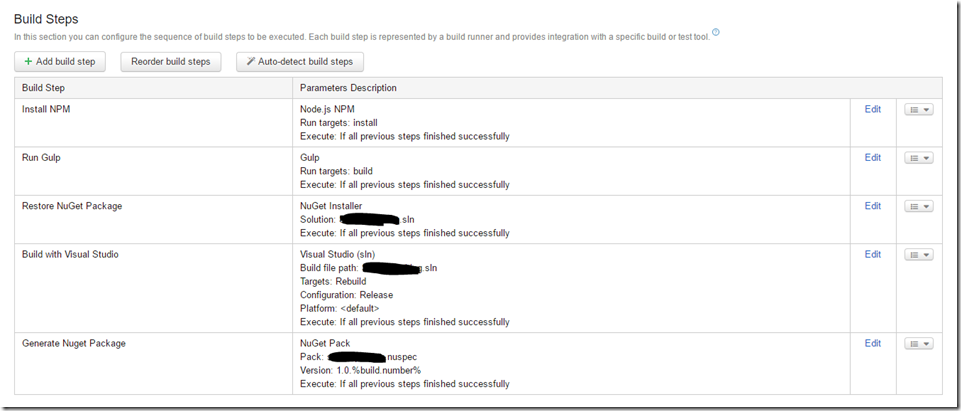
Reconfigure TeamCity Steps

  • Install NPM
  • Run Gulp
  • Restore NuGet Pakage
  • Build Solution
  • Generate Nuget Package

image

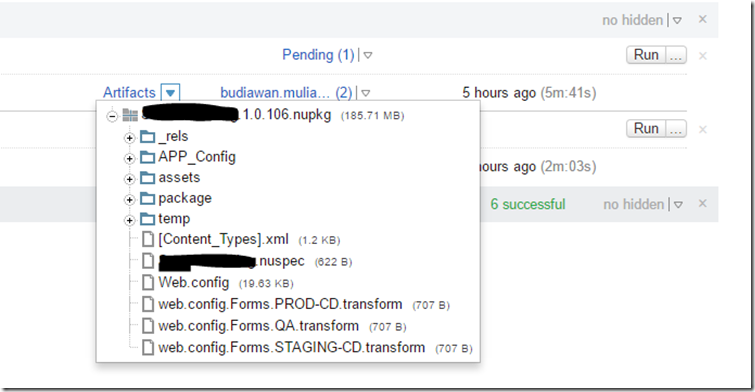
After a successful build, you will get the artefacts similar to the ones shown below:

image

Step Three

Push package to Octopus

To achieve this, you will need to install the Octopus OctoPack PlugIn within TeamCity, the official documentation can be found here. Once you have installed the plugIn you can create release step as shown in below:

image

Step Four

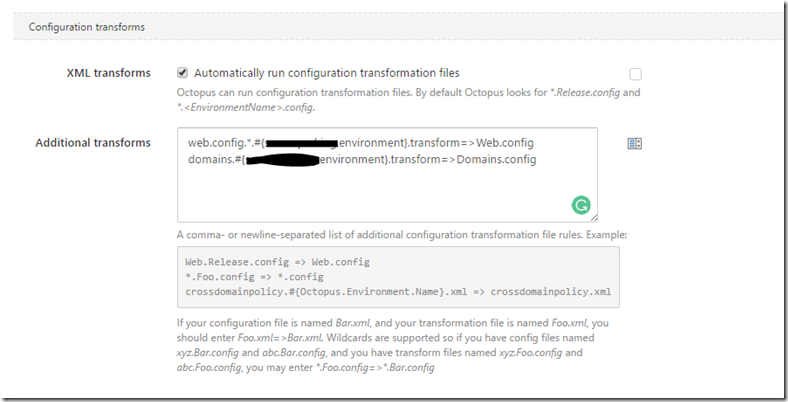
As explained above, we are going to utilize octopus to transform the settings for each environment.  Example:

image

Step Five

Deploy the TDS packages in order.

In order to achieve this we need to: 

  • Update the TDS package, so it follows a naming convention that applies a numeric prefix i.e. 01.Sitecore.Foundation.Serialization.Master.scitems.update.  This ensures that the TDS packages will be listed in order, and subsequently installed in order.
  • Created a PowerShell script to install the TDS packages in alphabetical order.

Here is the result:

image

The above steps are all that are required to successfully deploying Helix Solution using Octopus, using TeamCity with a little help from PowerShell.

I hope you found this article useful.

0 Comments

I would like to share the experience of joining Sitecore Hackthon 2017 competition.  It’s a global  24 hours competition organized by Askshay Sura and supported by Sitecore.  This year there are 92 teams from 26 countries being represented.  

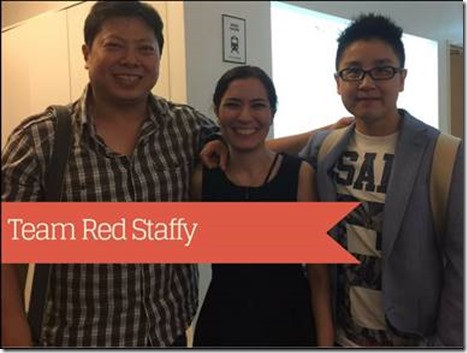
Azadeh, Budi and I,  as a team,  attended the competition last weekend and we created a Sitecore ChatBot. If you like us, please give me a thumb

https://www.facebook.com/walle.yuan/posts/10213259608590954?pnref=story

clip_image001

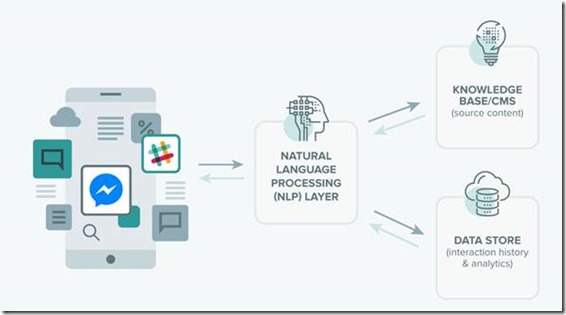
A chatbot is a service, powered by rules and sometimes artificial intelligence, that you interact with via a chat interface. The service could be any number of things, ranging from functional to fun, and it could live in any major chat product (Facebook Messenger, Slack, Telegram, Text Messages, etc.)

clip_image002

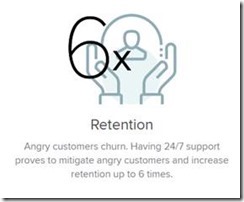
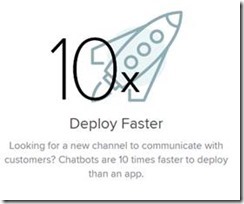
  • What it can do for business?

clip_image003clip_image004clip_image005

  • So, What Sitecore ChatBot does?

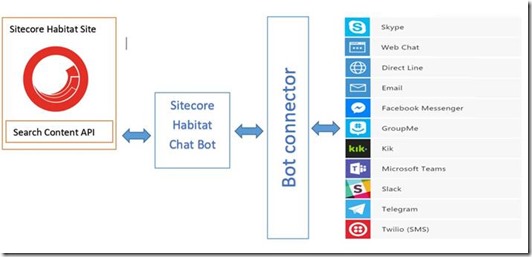
We utilized the Azure Chatbot service and integrated with Sitecore, so as to make the response more focused and relevant to the business. Business can launch the business to different communication channels in a sec. 

clip_image006

  • Videos we created about the technologies we were using

Part1: https://www.youtube.com/watch?v=mPR0pk-usBY …
Part2: https://youtu.be/UJrzGhjfpTo

0 Comments

Having not found time to write this entry until now James Hirka, who encouraged me to post this, probably will call me “Slacker” =P.  But ultimately I’m writing this to share my Troubleshooting experience with you.

Issue

Received an error message as shown below on UAT environment, but this solution totally working on Dev (local) Environment.

image

Troubleshooting Steps

The first reaction of seeing this error, I thought it’s because of the UAT server block the communication between SMTP provider and the server. So I tested with PowerShell script.


The PowerShell script worked.

I thought it could be caused by authentication,  so I tested with PowerShell with wrong password. Bingo! I got the same error message.   Then I checked the Sitecore configuration, however, it looks right to me.

<setting name="MailServer" value="xxxxxxx” />
<setting name="MailServerUserName" value="xxxxxxx"/>
<setting name="MailServerPassword" value="xxxxxxx" />
<setting name="MailServerPort" value="xxx" />

I also double checked the action parameters. same credentials.

What?! This is wired. what could be the issue!!

image

So I then start to output the SMTP settings credentials by overwriting the send email action.  The output looks correct. Why!!!,  What’s going on!!

Then I created a console application, just for testing and it worked fine..


Ultimate solution

Thanks to James Hirka, who introduced me a great tool Wireshark.  With Wireshark you can listen on a port and monitor all the requests from the sever.

image

Ultimately, we FOUND the issue: the password is wrong, This was caused by invalided xml format of the action parameter.

Here is the invalided action parameter

<Password>xxxx<Password>

Note this missing back slashin the above parameter, seriously?! .  There is still question about why the output is correct (Didn’t fail in the action, but in the pipeline.) This is not in the scope be in this post, but I will dig into the pipeline and post the result shortly.

Other suggestion to WFFM could be to put at least xml formatting validation for such field, it would be nice to validate the format early and may save a lot of time in future. 

0 Comments

I have to admit that the most painful process for setting up Sitecore solution is to configure CD/CM on each of the environments, and most worse case is you will have to do it again and again.  It’s not only time consumed, but also causing unexpected errors if you accidently disabled configuration which shouldn’t have been disabled. Then you will be like this

image

It could take up to an hour to configure each of the server. Imagine you have UAT (CDx2 and CM), PROD (CDx2 and CM), then you will probably spend half day just configuring these files.

Therefore, I decided to create a PowerShell script to automate the whole process.  Here is the example, but you can find the entire script on Github.

The current script is for Sitecore 8.2.2 based on Sitecore official documentation, I will continuously update the script to support more version of Sitecore.  If you think it’s a good idea and also would like to contribute for specific version,  please feel free to make a pull request.

The “SCRIPT SETTINGS” is global settings, you can integrate with Octopus variables for automatically configure different environments.