Work with Sitecore Azure
- Posted in:
- Sitecore
Sitecore Azure Module provides an integrated user interface to manage the cloud delivery infrastructure and simplify the deployment of your website to the Microsoft Azure cloud. It would be a good start to read “Getting started with Sitecore Azure”, before you install. It gives you an overview about what is the Sitecore Azure and why you will need Sitecore Azure, and examples about how both the content editing and content delivery environments run in the Microsoft Azure cloud etc. There are quite many guidance on getting started with using Sitecore Azure Module, but not so much how it actually working. This article will start with the introduction of Sitecore Azure, then will talk about how it actually work in the 2nd part. If you already know what Sitecore Azure module is and how get it installed, you can probably jump into 2nd part.
Why Sitecore Azure
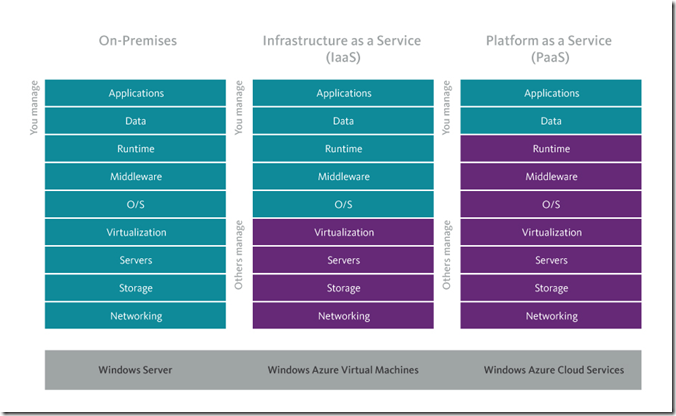
The traditional software development deploy web application on On-Premises, which requests companies to purchase all elements of infrastructure and operating system as well as teams to maintain and deploy. with the introduce of cloud and its natural advantages – less maintenance cost and running cost, it becomes more and more adoptable and acceptable. Here is the comparison between different type of services
Because of this, Sitecore introduced Sitecore Azure module which allows you to deploy and manage Sitecore powered websites on Microsoft Azure utilizing PaaS deployment in a matter of minutes. With out-of-the-box functionality, deployment of web servers and SQL databases to the cloud are automated based on set optimization structures simplifying any deployment headaches.
How to install Sitecore Azure Module
Following the following steps to install Sitecore Azure and Deploy to Azure:
Step One
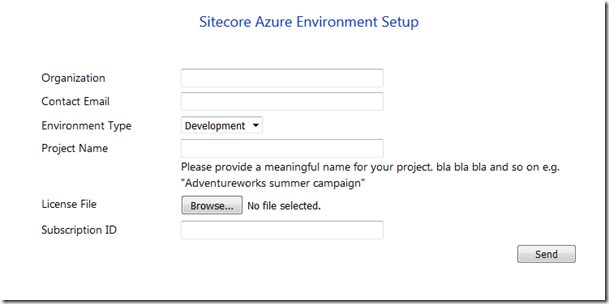
Apply Environment.xml file from http://scazureenvironments.trafficmanager.net/. It’s only taking 10 mins (initially it did take 1-2 business days to receive the Environment.xml, but nowadays they do it faster)
 ‘
‘
Step Two
There are two options for establishing to Azure Option A is a very fast and simple method offered by Microsoft. you can generate publishsettings from this link and then follow the instructions on the Microsoft site to get the file, then upload the file for Sitecore. Alternatively, for advanced users, you many choose Option B in which you either use an existing certificate or generate a self-certificate. Upload the .pfx for Sitecore. Once you have selected either a .publishsettings or .pfx file , you will have to provide a password for uploading to Sitecore.
Step Three
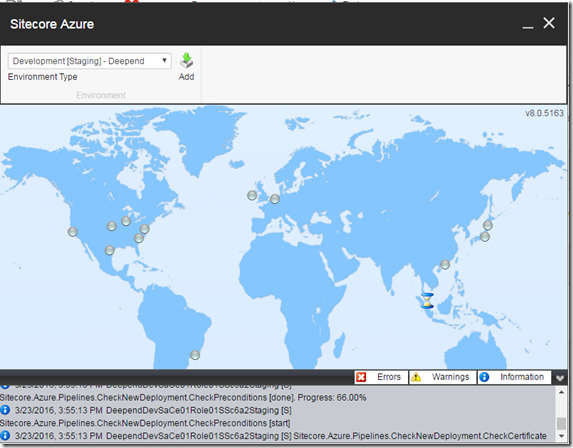
When deploying to azure, it allows you to monitor the real-time progress.
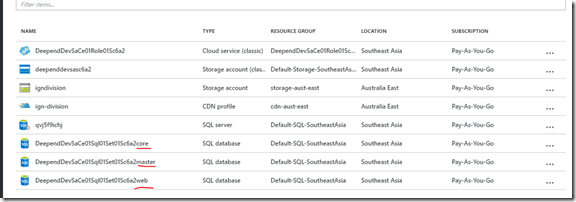
All you need to do now is to take a cup of tea and waiting for Sitecore to create all the webapp, database on Azure.
Troubleshoot
You might got 500 error after you first deploy to Azure, this is caused by oversize web.config. For solving the error, you can update the web.cofing under AzurePackages folder by replacing Sitecore section with <sitecore configSource="App_config\Sitecore.config" />
References
https://doc.sitecore.net/cloud/azure/getting_started_with_sitecore_azure


