Hands-on with Sitecore Helix (TDS)
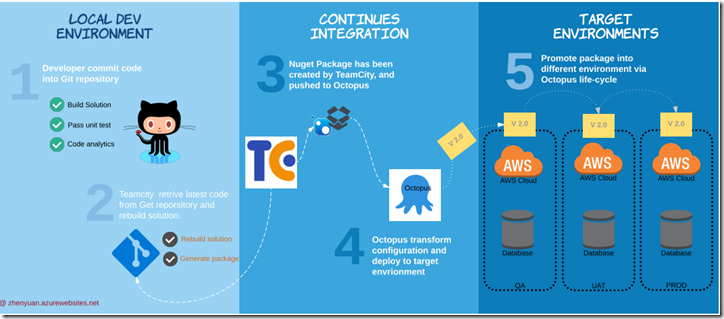
Continues Integration with TeamCity and Octopus Deploy
Since 2016, Sitecore has been promoting Sitecore Helix and encouraging all partners, and developers to follow the framework. The purpose of Helix is to make the modules easier to code, test and maintain. If you want to stay ahead of the curve, then you should start to implement Helix for your clients. Practice makes perfect. The article is going to explain how to setup the auto-deployment with TeamCity and Octopus with Sitecore Helix solution. There are two versions of Helix solution, one is using Unicorn, and the other is using TDS. Today, I’m going to focus on the TDS version.
Before I start I’m going to assume you are already familiar with TeamCity and Octopus. If not, please read the official document for TeamCity and Octopus deploy first.
You might already be using continues delivery with TeamCity and Octopus, as this is not a new concept, However there are some new requirements for deploying Helix projects.
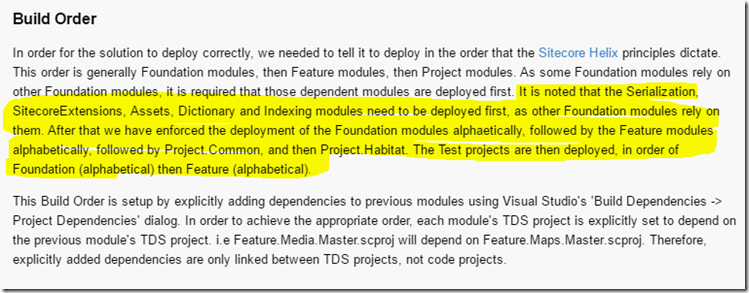
- Build Order
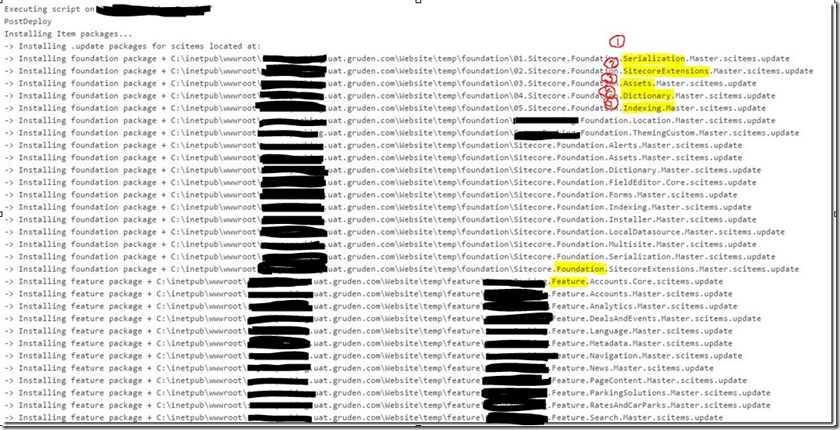
As mentioned in the Helix Solution ReadMe file, Serializationn, SitecoreExtension, Assets, Dictionary and Indexing modules need to be deployed first, and followed by Foundation modules and then Feature modules.
- Configuration Transform per feature projects
Also, given the fact that Helix is utilizing XDT transforms, we are going to use XDT transforms for configuring Content Management Server (CM) and Content Delivery Server (CD).
In order to achieve the above requirements, I have modified the original solution to support Sitecore Helix, using the steps below:
Step one
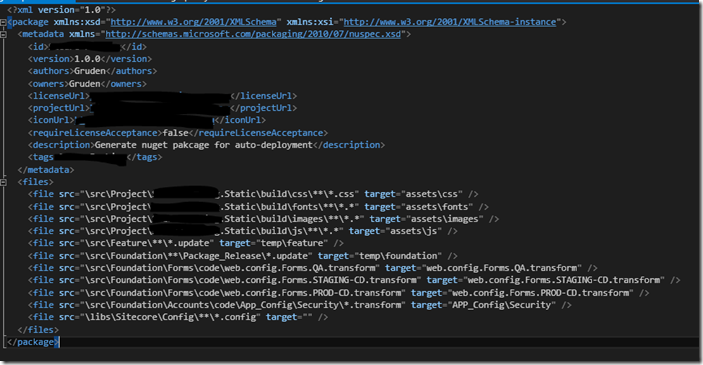
Creating a Nuspec File, includes all transforms.
Example:
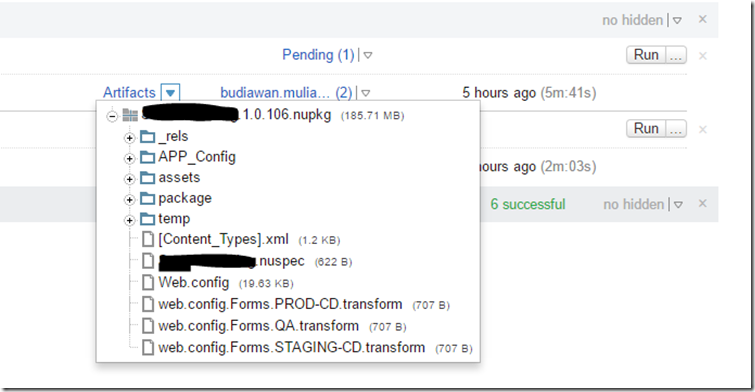
You might notice that the transform file has applied a naming convention i.e. web.config.Forms.STAGING-CD.transform. STAGING-CDis the environment as defined within octopus. This gives us the capability and flexibility to process the configuration transform based on the target environment, something that is difficult to achieve within most of Sitecore solutions, especially when you have multi-instance architecture (i.e. CD/CM). For more information on how Octopus transform configure files, please refer to the official documentation.
Step Two
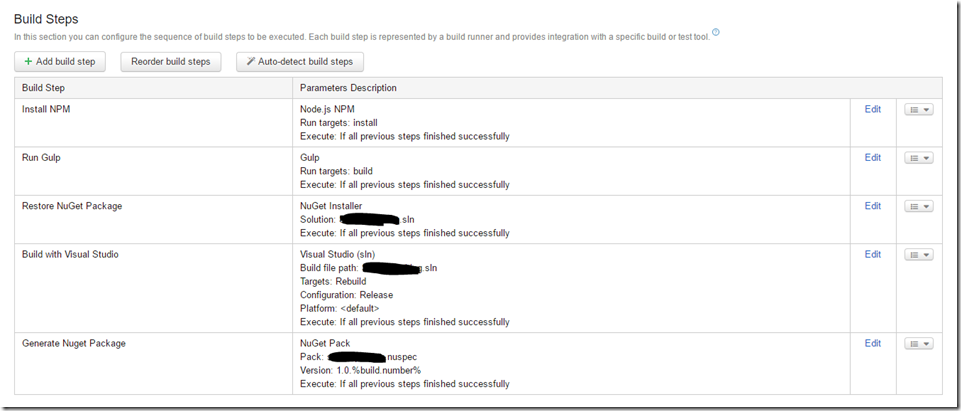
Reconfigure TeamCity Steps
- Install NPM
- Run Gulp
- Restore NuGet Pakage
- Build Solution
- Generate Nuget Package
After a successful build, you will get the artefacts similar to the ones shown below:
Step Three
Push package to Octopus
To achieve this, you will need to install the Octopus OctoPack PlugIn within TeamCity, the official documentation can be found here. Once you have installed the plugIn you can create release step as shown in below:
Step Four
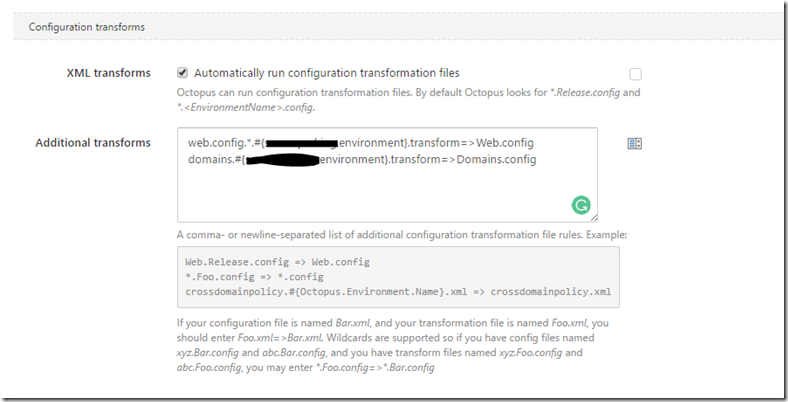
As explained above, we are going to utilize octopus to transform the settings for each environment. Example:
Step Five
Deploy the TDS packages in order.
In order to achieve this we need to:
- Update the TDS package, so it follows a naming convention that applies a numeric prefix i.e. 01.Sitecore.Foundation.Serialization.Master.scitems.update. This ensures that the TDS packages will be listed in order, and subsequently installed in order.
- Created a PowerShell script to install the TDS packages in alphabetical order.
Here is the result:
The above steps are all that are required to successfully deploying Helix Solution using Octopus, using TeamCity with a little help from PowerShell.
I hope you found this article useful.
