Sitecore SXA - Creating custom components
Sitecore recently released the Sitecore Experience Accelerator (SXA) and I guess that It is still quite new to most of Sitecore developers.
Recently I was asked to implement SXA for one of our clients and while there is a lot of information online covering SXA and how SXA can be used to quickly create websites, there is no much documents for us developers! So many advanced features are not covered in details (at least not at the time of writing this). Therefore, I am going to share my experience with SXA here.
Specifically, I will explain how to create custom components with SXA. If you don’t know about what SXA is, I would suggest to read the below listed articles:
- Introduction of SXA - http://www.sitecore.net/en/products/sitecore-experience-platform/wcm/experience-accelerators
- Getting started with SXA - https://doc.sitecore.net/sitecore_experience_accelerator/getting_started_with_sxa
As you may already know, SXA has been implement using the Helix principles. Helix principles are however not covered within this post. If you want to get familiar with Sitecore Helix, there are many resources available online.
Now, let’s get started! Let’s start by creating an SXA component step by step together.
What we want to achieve here?
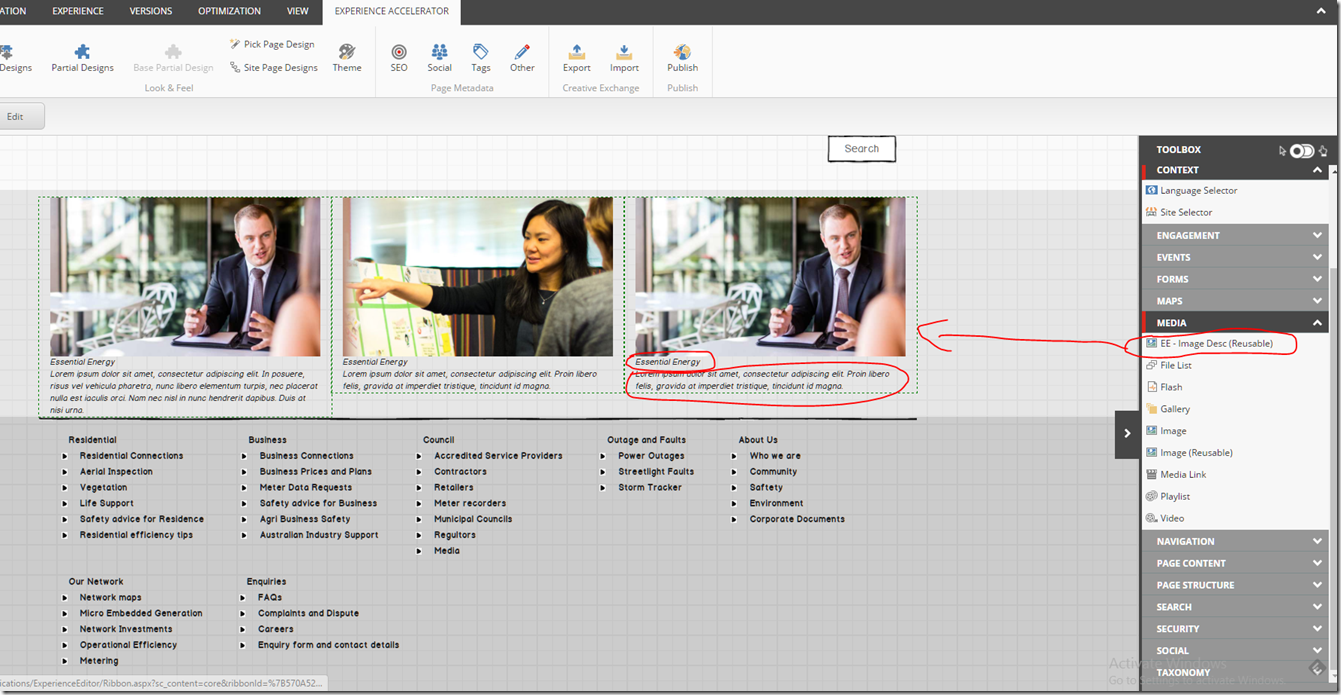
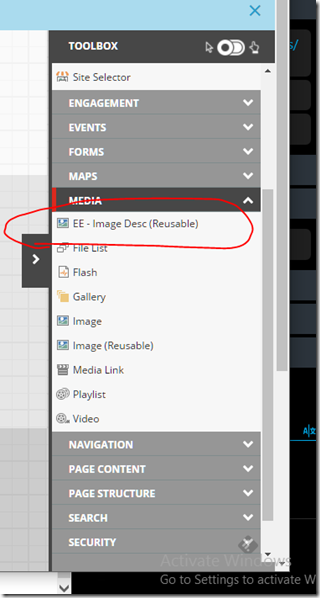
To create custom SXA component and register on the Tool bar so as to allow user to drag and drop into a page.
Getting started to create custom SXA component
Step 1 – Install Sitecore and SXA
I’m using SXA 1.3, it requires Sitecore 8.2 rev.170407. you can download from here.
SXA heavily relies on Sitecore PowerShell Extensions, so please make sure you has installed PowerShell Extensions 4.5.
Step 2 – Setup Helix solution
Setup Sitecore Solution following the Helix principles. Sitecore also provide a sample Helix solution called Habitat, which can be found on Github. Habitat is a good starting point if you want to learn how to build website using the Helix principles.
Step 3 – Create a new feature
There is not much difference for creating a SXA component. It’s very similar to how you would create standard component within Stiecore solution.
Rendering Controller
First, you will need to create a controller. The only difference here is that the controller needs to inherit from SXA StandardController; this can be found under the Sitecore.XA.Foundation.Mvc.Controllers namespace, as shown in below snippet:
Rendering Model
Then, create rendering model, called ImageRenderingModel, by inheriting from SXA RenderingModelBase; this can be found under Sitecore.XA.Foundation.Mvc.Models namespace, as shown in below snippet:
RenderingModel Repository
After that, the next step is to create a repository for retrieving data from datasource. I created a model repository called ImageRepository by inheriting from ModelRepository; this can be found under Sitecore.XA.Foundation.Mvc.Repositories.Base namespace, once again as shown in below snippet:
Rendering View
Finally, I’m going to create a rendering view as shown in below snippet:
Step 4 – Register Image Repository in IoC
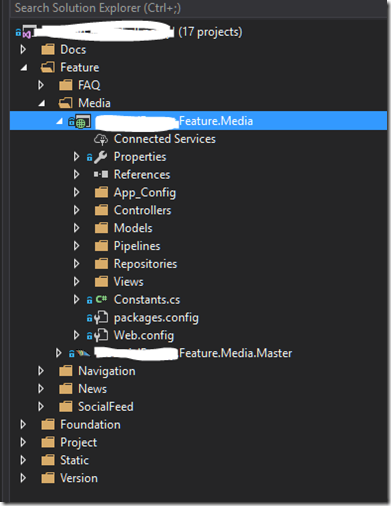
As you can see in the screenshot below, the MediaImge controller constructor has a IImageRepository parameter. In order to inject IImageRepository into the controller, it needs to be registered in IoC.
SXA has implemented its own IocProcessor, which allows us to easily register custom repositories into the SXA IoC ServiceCollection via a pipeline.
Here is the code for leveraging IocProcessor to register the ImageRepository.
Next, I will add the service I just created into pipeline:
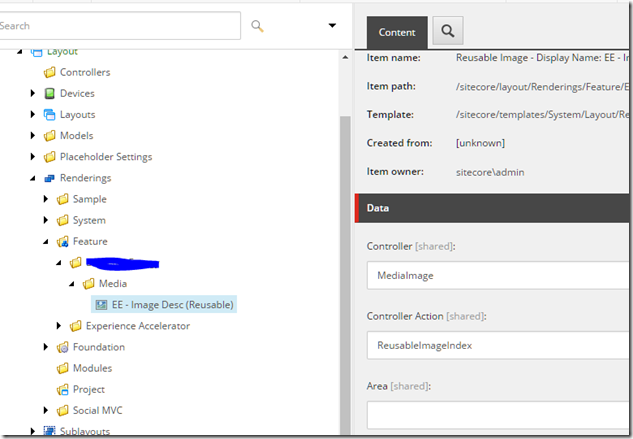
Step 5 – Create rendering controller in Sitecore
I am going to assumed you are already familiar with Sitecore, so i’m not going to explain how to create a rendering controller in Sitecore.
Step 6 – Add new component into SXA tool bar.
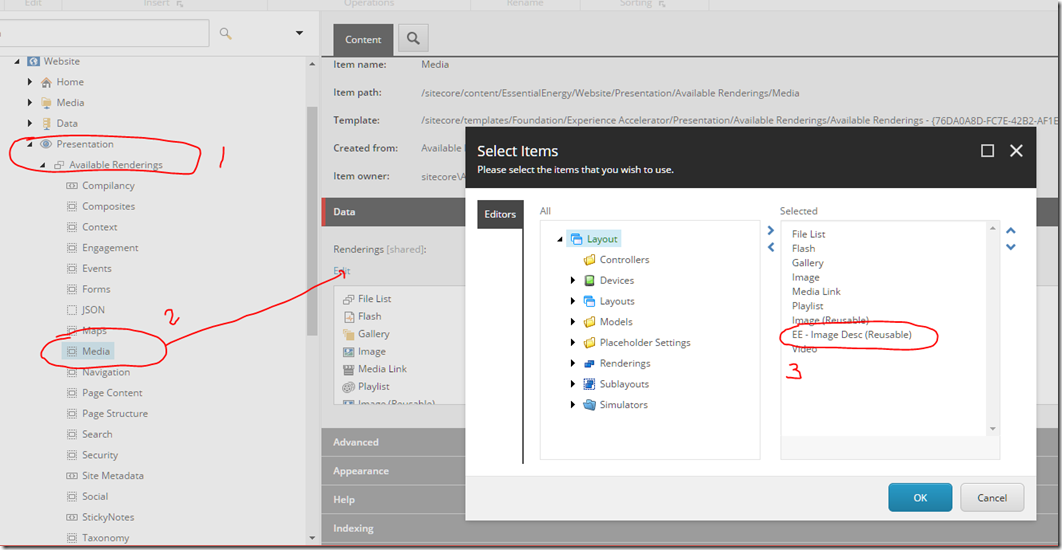
Finally, we just need to add the rendering by selecting presentation –> Available Renderings –> Media and selecting the rendering controller we just created.
Congratulation, now you successfully created your first SXA component.
I hope you found this article is useful. Please follow my blog, and feel free to email me if you have any questions about SXA.


Comments
This is a great article which simplifies the steps involved to create custom component. It would be helpful if the entire solution could be shared in github
Poojitha Hebbar