0 Comments

In my previous post, I explained how to create custom facets and store them in xDB. In this post, I’m going to show you how to display custom facets in Experience Profile.

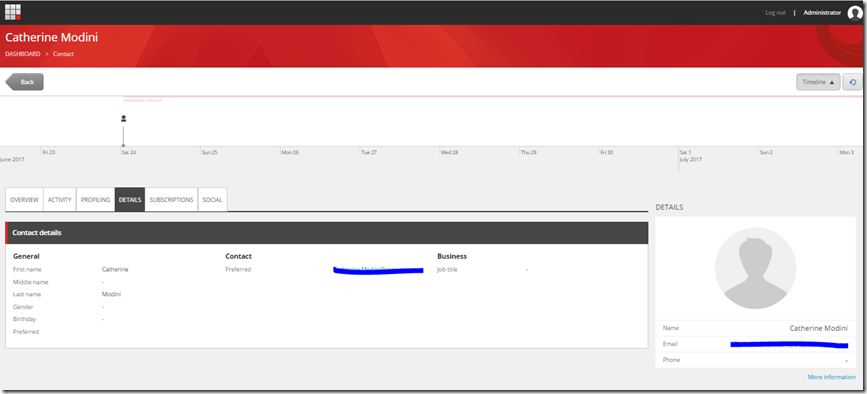
Experience profile lets you monitor the behaviour of contacts that have interacted with the website. It allows you to search a specific contact, either via either name or email. 

If you click on the contact, then you will be able to view the contact profile as shown in below.  This is cool right?!, however, you may find that Sitecore does not automatically display custom facets. 

image

In order to to achieve this, custom code is required. Therefore, I’m going to show you how to create a custom tab in the contact profile and display custom facets step by step.

STEPOne – Create custom facets

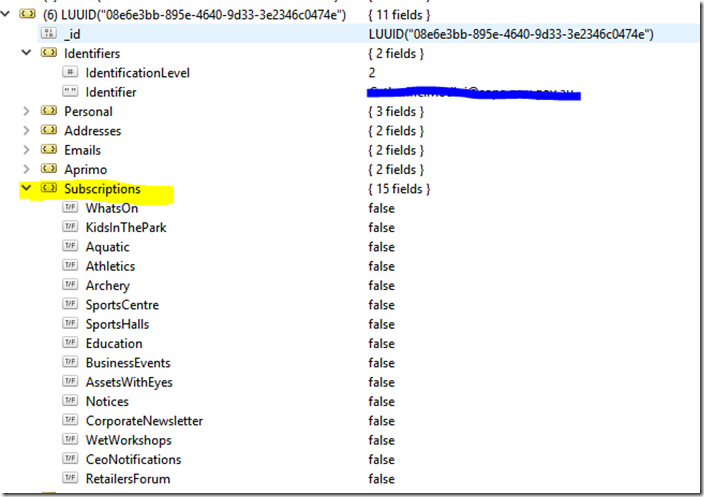
In my previous post, I’ve created a newsletter subscriptions facets and stored in xDB.

image

However, creating custom facets is not the scope of this post, if you want to learn how to create custom facets, you can refer to my previous post here.

STEP Two – Create Web API for retrieving the facets by contact id

This is much like any other WebAPI you will have created, and I would recommend applying access restrictions to the API for security reasons, you can apply Sitecore’s existing security filter called AuthorizedReportingUserFilteruse, which is defined in Sitecore.Cintel.dll.

Here is an example code:


Once you complete the implementation of your API, the next step is to register the API in route.

image


STEPThree – Create SPEAK script; this will call our API

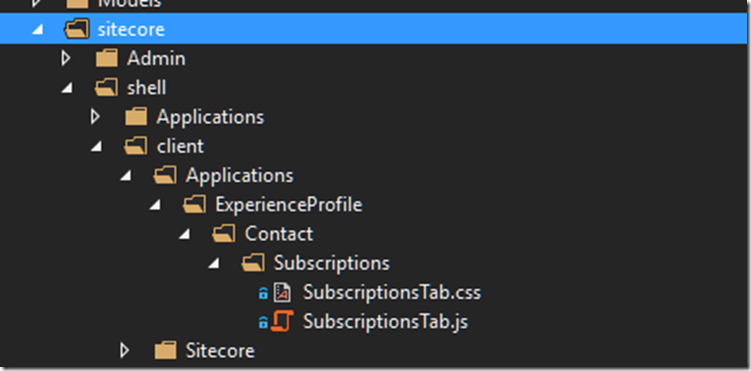
  • Firstly, I’m going to create a folder called “Subscriptions” under /sitecore/shell/client/Applications/ExperienceProfile/Contact/Subsriptions
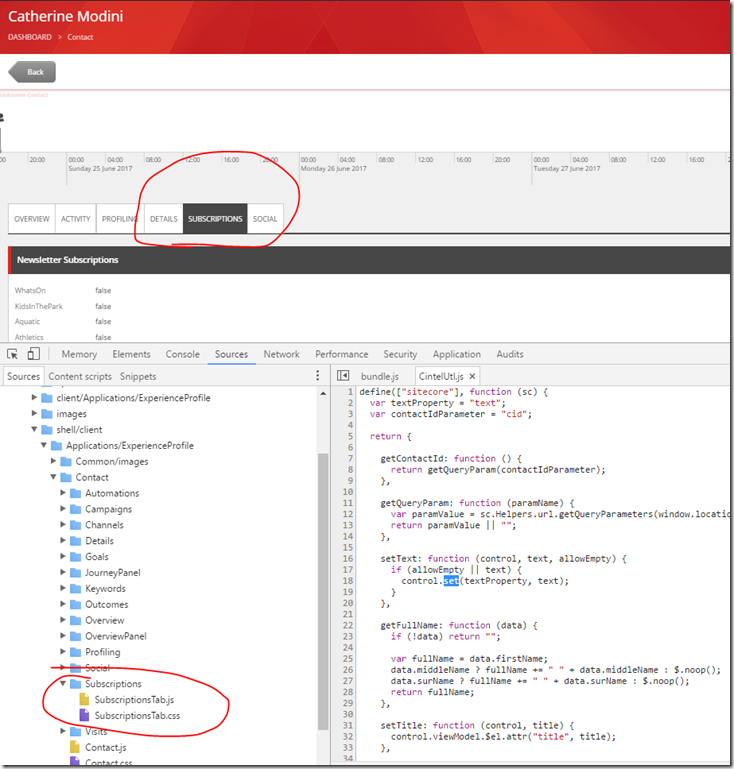
  • Next, I will add subscriptionsTab.js and subscriptionsTab.css under the folder. (as shown as below)

image

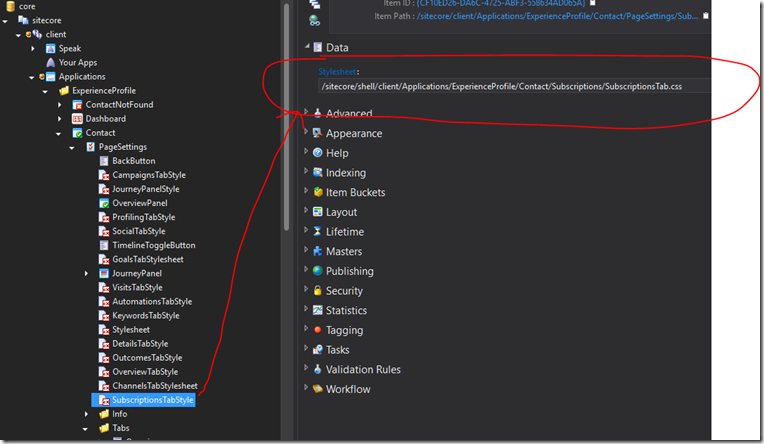
  • Associate the created CSS in core database

you will need to add style item in core database and point at the css file.  The defined css will be loaded automatically, when contact profile page is loading.

image

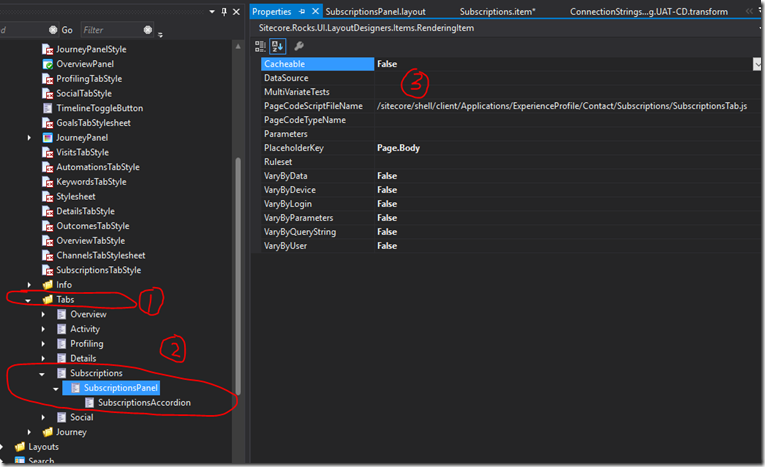
  • Associate the created JavaScript in core database

In this step, I created a new custom Tab, called “SubscriptionPanel” and PageCodeScriptFileName is where you should associate with the JavaScript we just created above.

 image

In order to verify what you’ve done so far is correct.  you should be able to see the new custom tab “Subscription”, and  both subscriptionsTab.js and subscriptionsTab.css are loaded, after contact profile page is loaded.

image

The next step is to write a script for retrieving the data via the custom API you created above. Sitecore use SPEAK as a framework for developing Sitecore application with a consistent interface.  The syntax is very simple to follow and extend.

Here is the sample code for calling the API and return Json.

STEPFour – Binding Json object to the controller on the custom Tab

The last step is to display the Json data on the custom Tab.

In the above code snippet,  you will find this code cintelUtil.setText($that.WhatsOnValue, jsondata.WhatsOn, true);.  this sets TextBox “WhatsOnValue” within the controller, so it contains the Json value.  Then, the next question is how to define the “WhatsOnValue” textbox in Sitecore?  Don’t fret, I will show you how this can be done!.

  • Add Text rendering (Note: because I’m using SPEAK 1.1 framework,  I will have to select the Text rendering under SPEAK 1-1)

image 

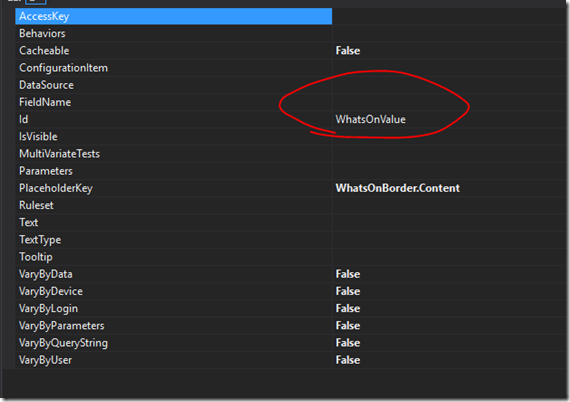
  • Set the ID to “WhatsOnValue”, this is the ID where the cintelUtil.setTextto function is referring to.

image

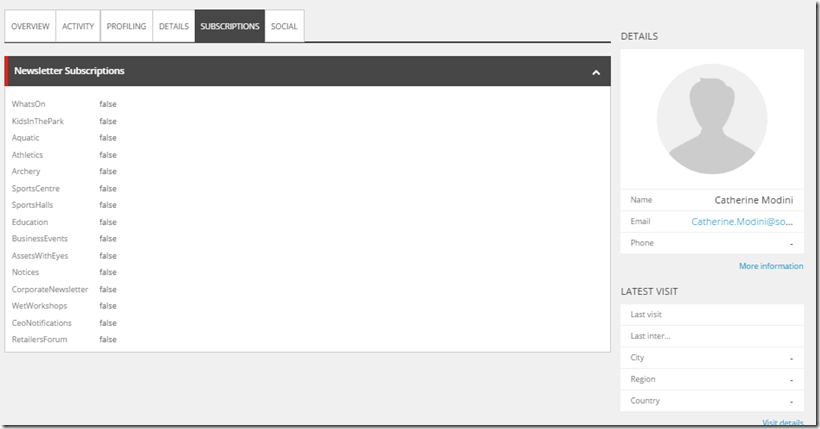
Congratulation!! you’ve done all the code and configuration.  Now let’s check out the result,  The “subscriptions” tab should display in the contact profile page as well as the custom facets associating with the contact.

image

Hope you found this post is useful, and enjoyed this article.
1 Comments

image

Sitecore recently released the Sitecore Experience Accelerator (SXA) and I guess that It is still quite new to most of Sitecore developers.

Recently I was asked to implement SXA for one of our clients and while there is a lot of information online covering SXA and how SXA can be used to quickly create websites, there is no much documents for us developers!  So many advanced features are not covered in details (at least not at the time of writing this).  Therefore, I am going to share my experience with SXA here. 

Specifically, I will explain how to create custom components with SXA. If you don’t know about what SXA is,  I would suggest to read the below listed articles:

As you may already know, SXA has been implement using the Helix principles.  Helix principles are however not covered within this post.  If you want to get familiar with Sitecore Helix, there are many resources available online.

Now, let’s get started! Let’s start by creating an SXA component step by step together.

What we want to achieve here?

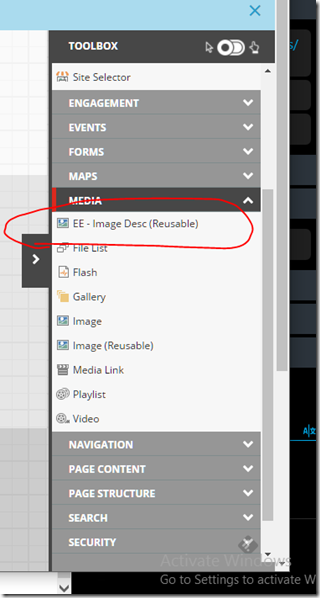
To create custom SXA component and register on the Tool bar so as to allow user to drag and drop into a page.

image


Getting started to create custom SXA component

Step 1 – Install Sitecore  and SXA

I’m using SXA 1.3, it requires Sitecore 8.2 rev.170407.   you can download from here

SXA heavily relies on Sitecore PowerShell Extensions, so please make sure you has installed PowerShell Extensions 4.5.

Step 2 – Setup Helix solution

Setup Sitecore Solution following the Helix principles.  Sitecore also provide a sample Helix solution called Habitat, which can be found on Github.  Habitat is a good starting point if you want to learn how to build website using the Helix principles.

image

Step 3 – Create a new feature

There is not much difference for creating a SXA component. It’s very similar to how you would create standard component within Stiecore solution.

Rendering Controller

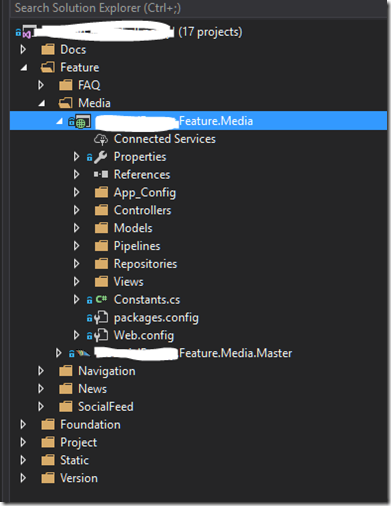
First, you will need to create a controller. The only difference here is that the controller needs to inherit from SXA StandardController; this can be found under the Sitecore.XA.Foundation.Mvc.Controllers namespace, as shown in below snippet:

Rendering Model

Then, create rendering model, called ImageRenderingModel, by inheriting from SXA RenderingModelBase; this can be found under Sitecore.XA.Foundation.Mvc.Models namespace, as shown in below snippet:

RenderingModel Repository

After that, the next step is to create a repository for retrieving data from datasource. I created a model repository called ImageRepository by inheriting from ModelRepository; this can be found under Sitecore.XA.Foundation.Mvc.Repositories.Base namespace, once again as shown in below snippet:

Rendering View

Finally, I’m going to create a rendering view as shown in below snippet:

Step 4 – Register Image Repository in IoC

As you can see in the screenshot below, the MediaImge controller constructor has a IImageRepository parameter. In order to inject IImageRepository into the controller,  it needs to be registered in IoC.

SXA has implemented its own IocProcessor, which allows us to easily register custom repositories into the SXA IoC ServiceCollection via a pipeline.

image

Here is the code for leveraging IocProcessor to register the ImageRepository.

Next, I will add the service I just created into pipeline:

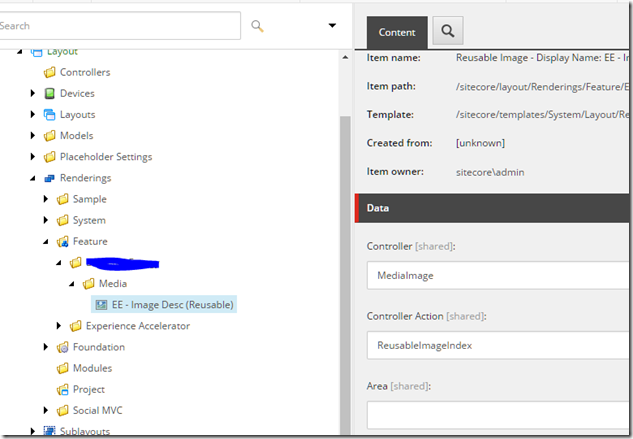
Step 5 – Create rendering controller in Sitecore

I am going to assumed you are already familiar with Sitecore, so i’m not going to explain how to create a rendering controller in Sitecore.

image

Step 6 – Add new component into SXA tool bar.

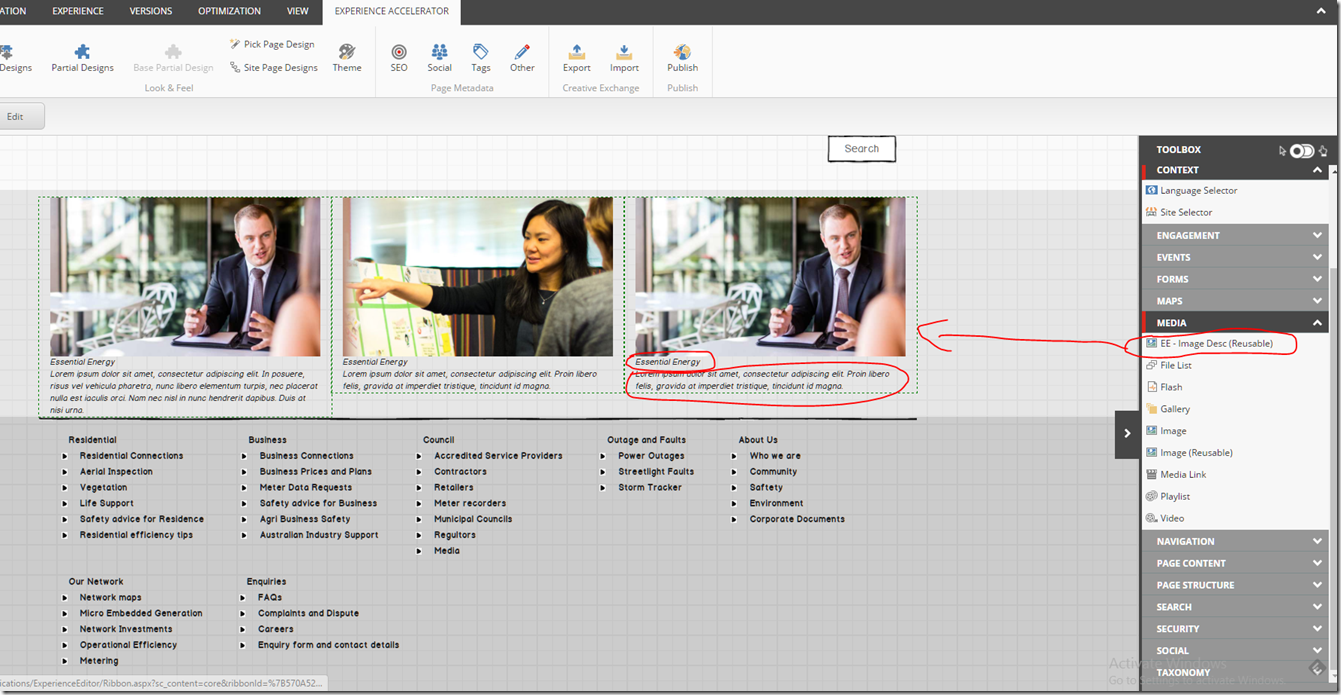
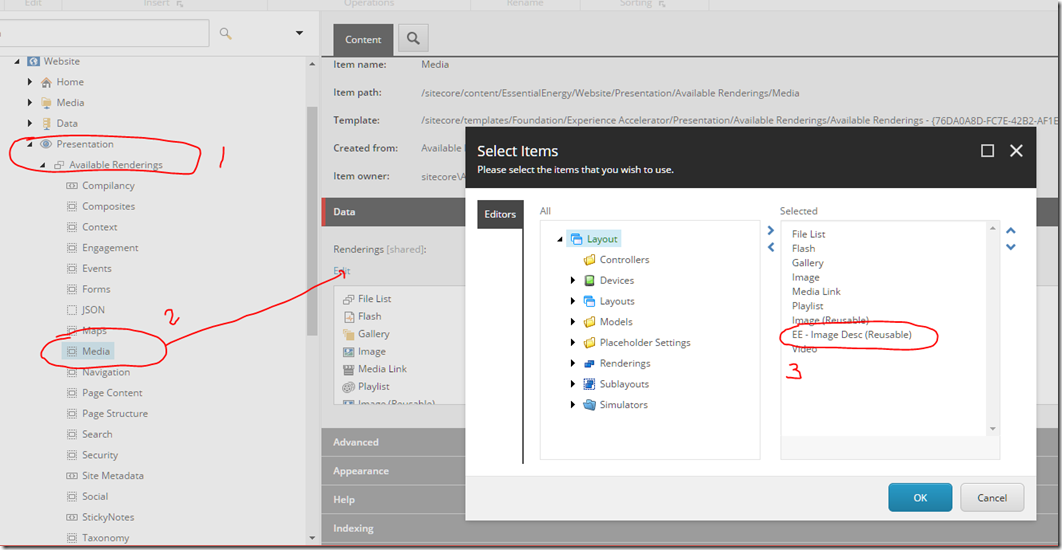
Finally, we just need to add the rendering by selecting presentation –> Available Renderings –> Media and selecting the rendering controller we just created.

image

Congratulation, now you successfully created your first SXA component.

image


I hope you found this article is useful. Please follow my blog, and feel free to email me if you have any questions about SXA.

0 Comments

image

If you are using the latest EMX 3.4, you may already know that Sitecore replaced their MTA with Sparkpost.  In previous versions,  you would need to have Sitecore Application Centre credentials and an MTA subscribed Sitecore licence before you start to use Sitecores MTA. 

Now, you no longer need to access the Sitecore Application Centre as Sitecore is fully integrated with Sparkpost for EXM 3.4. Further more DKIM (DomainKeys Identified Mail) has been implement within EXM.


What is DKIM?

DKIM lets an organization take responsibility for a message that is in transit.  The organization is a handler of the message, either as its originator or as an intermediary. Their reputation is the basis for evaluating whether to trust the message for further handling, such as delivery.

Technically DKIM provides a method for validating a domain name identity that is associated with a message through cryptographic authentication. So instead of passing user name and password to SMTP server, it passes an encrypted key to the mail server.  This helps to keep your email campaigns out of spam folders and it ensures that others cannot use your domain without permission.

You can read more about DKIM here


How to configure DKIM in Sitecore?

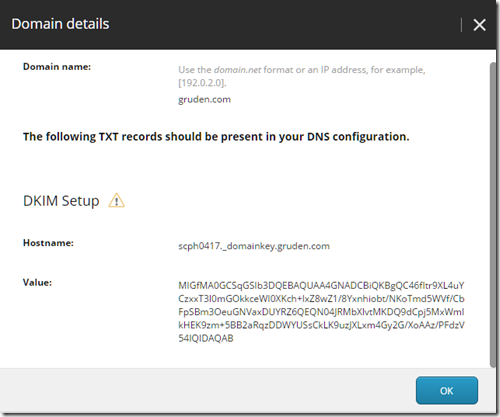
Firstly, you will need to add domain. Purpose of adding each domain is to validate the domains that you want to use to send email campaigns. This domain is not registered within the MTA, but instead Sitecore validates the sending domain by DKIM (DomainKeys Identified Mail).

image


Secondly,  add the TXT records in DNS configuration.

The method of adding TXT record differs in different hosting environments, however it is as simple as adding a recording of type 'TXT' and providing the "Hostname" and "Value" i.e. a DKIM key. For more information on these records, please check this link.

Changes to domain records can take up to 24 hours to take affect.

image

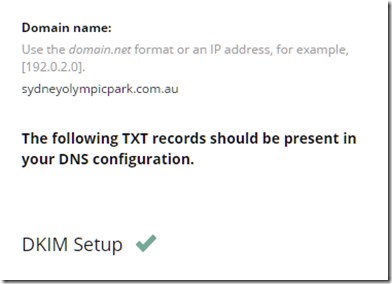
If the hostname and key are valid, you should see a green tick; as per the below screen shot.

image


Last but not least,  you need to disable the custom SMTP configuration and enable Sparkpost configuration. This can be done by removing the suffix .disabled from the following files:

  • Sitecore.EDS.Providers.Sparkpost.config.disabled
  • Sitecore.EDS.Providers.Sparkpost.Sync.config.disabled
  • Sitecore.EDS.SparkPost.Client.config.disabled


Do I have to configure DKIM for different environments?

No.  Once the domain has been added against your Sitecore licence (within EXM), it will take affect for all instances using this license, regardless of the environment i.e. UAT, Production etc.


How to verify it’s working? 

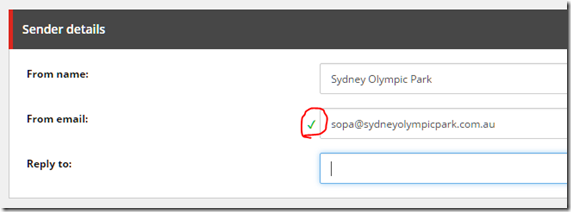
EXM will validate the “from email” based on the domains that you registered.

image

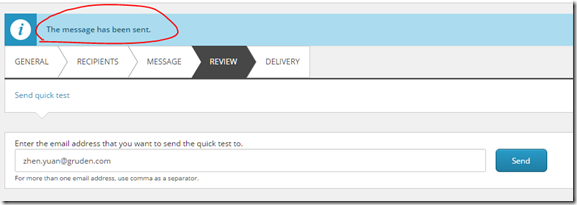
Alternatively you can use the “Review” option and send a quick test. If all the everything is correct, you should see a message successfully sent message at the top of the page.

image

0 Comments

First of all, I would like to thank Gruden for sending me to the Sitecore Helix workshop. It’s a two days workshop, which delivers in-depth knowledge of the principles, conventions and guidelines governing solution architecture, recommended development practices, DevOps strategies and more.


If you are also interested in this course, you can find more details here.


James Hirka, Solutions Architect from Sitecore, is the presenter. I’m not going to cover all the course material here, but instead highlight some important concepts that are covered within the course.

image


I would like to start by proving some background about what is Helix.

  • Helix is a an official guideline, recommending a modular build for Sitecore solutions
  • Habitat is an example implementation of Sitecore, using the Helix principles.

Habitat is a great starting point of learning Helix.  You can find the Habitat solution on GitHub.


Sitecore Helix was derived from the concept of components in a component-based architecture; this was originally described in the book “Agile Software Development by Robert C.Martin”.  The word component refers to a module in Helix, this is really all the files, views, renderings, configuration etc. that make up a component (or module). 


How we define a module/component? There are two major principles:

Cohesion Principles – Granularity

The principles of component cohesion is for deciding how to partition classed into components

  • REP (The reuse/release equivalence principle)
    The granule of reuse is the granule of release


  • CRP(The common reuse principle)
    The classes in a component are reused together. If you reuse on of the classes in a component, you reuse them all.


  • CCP(The common closure principle)
    The classes in a component should be closed together against the same kinds of changes. A change that affects a component affects all the classes in that component and no other components.

and Coupling principles – Stability

The principles of component coupling is for defining the relationships between components.

  • ADP (Acyclic Dependencies principle)
    Allow no cycles in the component dependency graph.


  • SDP (Stable Dependencies principle)
    Dependant in the direction of stability


  • SAP (Stable-Abstraction principle)
    A component should be as abstract as it is stable.

Favour composition over inheritance

  • Avoid multipurpose fat interfaces
  • Think of interfaces as roles
  • Implement just the minimum interface to ensure that you only depend upon what is required
  • Only expose what is required by a specific client


Practice makes perfect

I hope I didn’t put you to sleep with this very technical topic, and the principles it covered, however if you would like to work through some excises and get familiar with the Helix principles, you can find some here.   


Recommended Readings

Apart from the Sitecore Helix official documentation, there are some good books listed below:

[1] https://www.amazon.com/Agile-Principles-Patterns-Practices-C/dp/0131857258

[2] https://www.amazon.com/Clean-Code-Handbook-Software-Craftsmanship/dp/0132350882

[3] https://www.amazon.com/Domain-Driven-Design-Tackling-Complexity-Software/dp/0321125215

3 Comments

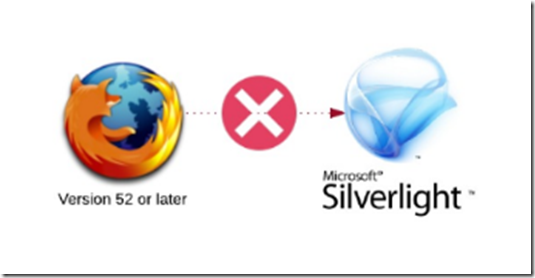
Mozilla Firefox 52 ended support for Silverlight

image

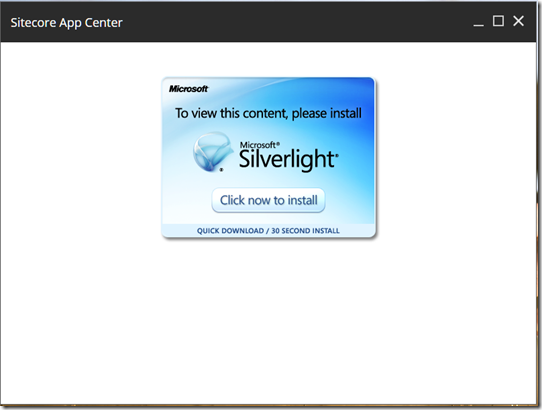
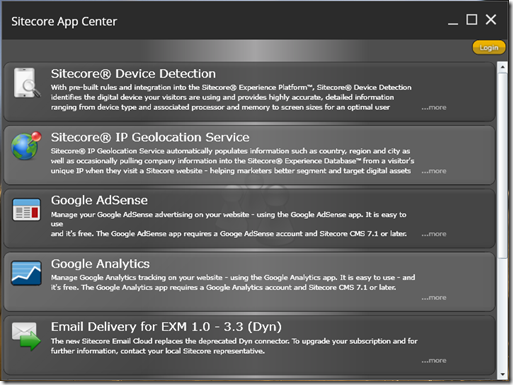
Is it matter? Yes, as we all known that Sitecore App Center was built on top of Silverlight. Since Version 42.0 Google Chrome has already stopped the support for Silverlight ( Find more Details).  However, you can still use Silverlight in Mozilla Firefox with Silverlight PlugIn. If you open your Sitecore App Centernow in Firefox, you see that the Install Microsoft Silverlight badge is displayed. When you reinstall Silverlight, the issure still occurs (See screenshot below). This is because Mozilla has ended of all NPAPI plugins except for Flash in March 2017, when Firefox version 52 is released. See this article for details. 

image

Don’t Panic!

Firefox Extended Support Release (ERS) will continue support these plugin until early 2018. Let’s pray Sitecore is ready for this transition to happen. To download the ERS click here

image

After you installed, Sitecore App Center is back.

image